Change Table or Cell Border Color, Line Style and Thickness in PowerPoint
by Avantix Learning Team | Updated September 10, 2023
Applies to: Microsoft® PowerPoint® 2013, 2016, 2019, 2021 and 365 (Windows)
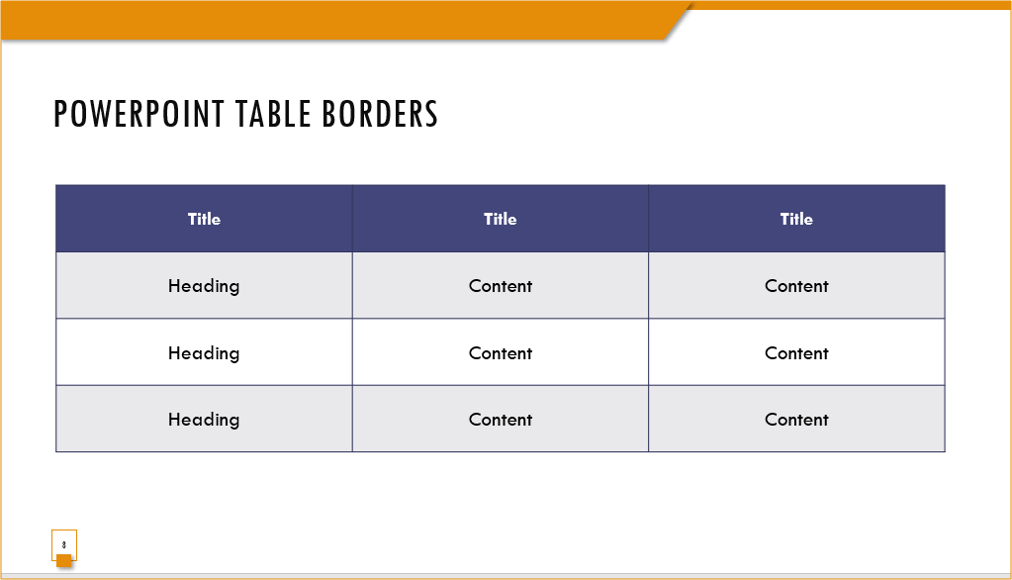
You can change the color of a table border or the borders of specific cells in PowerPoint. You can also change the border style and thickness (weight). Different borders can be applied to cells in the same table. For example, you could apply a thick line in a specific color to header cells and a thin line in a different color to the cells in the last row of a table. Borders can be applied to the top, bottom left or right side of a cell or cells. Tables are normally formatted first with table styles in PowerPoint and then you can apply custom borders to specific cells.
Unfortunately, you cannot customize table styles in PowerPoint in the same way as Microsoft Word.
To change cell border line style, weight or color, you will need to select the cells you want to change, choose the desired line style, weight or color and then apply the border you want.
Borders appear in the Table Styles group on the Table Tools Design or Table Design tab in the Ribbon:
Recommended article: How to Match Colors in PowerPoint Using the Eyedropper
Do you want to learn more about PowerPoint? Check out our virtual classroom or in-person classroom PowerPoint courses >
Note: Some Ribbon tabs may appear with slightly different names if you are working on Office 365 and have a smaller screen or different display settings. For example, Table Tools Design may appear as Table Design. Buttons may also appear with or without text.
Change the color of a table or cell border
When you create a table and apply table styles, the available colors are based on the selected color theme in the presentation. If you want to apply a border color to selected cells, it's best to use theme colors so that if you change the theme, the table colors will also change. Overall themes and color themes appear on the Design tab in the Ribbon in Normal View.
To change the color of a table or cell border:
- Select the cells to which you want to apply a border.
- Click the Table Tools Design or Table Design tab in the Ribbon.
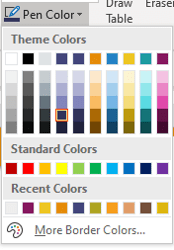
- In the Draw Borders group, click the Pen Color arrow. A drop-down menu appears.
- Click a color in the gallery. If you choose a Standard Color or More Colors, this will override the theme.
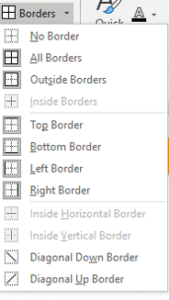
- Click the Borders arrow in the Table Styles group. A drop-down menu appears.
- Click the type of border you want in the menu (such as Bottom Border).
- Repeat for other borders (such as Top Border).
The Pen color drop-down menu appears as follows:
To change the line style of a table or cell border
To change the line style of a table or cell border:
- Select the cells to which you want to apply a border.
- Click the Table Tools Design or Table Design tab in the Ribbon.
- In the Draw Borders group, click the Pen Style arrow. A drop-down menu appears.
- Click a line style in the menu.
- Click the Borders arrow in the Table Styles group. A drop-down menu appears.
- Click the type of border you want in the menu (such as Bottom Border).
- Repeat for other borders (such as Top Border).
The Pen style (line style) drop-down menu appears as follows:
To change the line thickness or weight of a table or cell border
You can apply thin, medium or thick borders to table cells in PowerPoint. The thickness of a line or border is called weight and is measured in points.
To change the line thickness or weight of a table or cell border:
- Select the cells to which you want to apply a border.
- Click the Table Tools Design or Table Design tab in the Ribbon.
- In the Draw Borders group, click the Pen weight arrow. A drop-down menu appears.
- Select a line weight or thickness in the menu.
- Click the Borders arrow in the Table Styles group. A drop-down menu appears.
- Click the type of border you want in the menu (such as Bottom Border).
- Repeat for other borders (such as Top Border).
The Pen weight or thickness drop-down menu appears as follows:
Tips for working with borders in tables
You can select all three options (style, weight and color) first and then apply the borders for all settings at once.
If you choose All Borders in the Borders drop-down menu, borders will be applied to the top, bottom, left and right of the each cell in the selection.
If a pencil icon appears and you want to get rid of it, press Escape.
Subscribe to get more articles like this one
Did you find this article helpful? If you would like to receive new articles, JOIN our email list.
More resources
How to Highlight Text with Emphasis Animation
How to Compress Images in PowerPoint to Reduce File Size (10 Ways)
How to Add Animation in PowerPoint (Animate Images, Text and Other Objects)
How to Reorder Objects in PowerPoint Using Bring to Front or Send to Back (with Shortcuts)
How to Convert a PDF to Word in Microsoft Word (For Free Without Using Third Party Programs)
Related courses
Microsoft PowerPoint: Intermediate / Advanced
Microsoft PowerPoint: Design for Non-Designers
Microsoft PowerPoint: Animations Bootcamp
Our instructor-led courses are delivered in virtual classroom format or at our downtown Toronto location at 18 King Street East, Suite 1400, Toronto, Ontario, Canada (some in-person classroom courses may also be delivered at an alternate downtown Toronto location). Contact us at info@avantixlearning.ca if you'd like to arrange custom instructor-led virtual classroom or onsite training on a date that's convenient for you.
Copyright 2024 Avantix® Learning
You may also like
How to Insert or Type I with an Accent Mark in Word (Í, í, Ì, ì, Î, î, Ï, or ï)
You can insert or type i with an accent mark in Word using built-in tools or keyboard shortcuts (including Alt code shortcuts). The letter i can be inserted with an accent in both upper or lower case. The following are common accented characters that you can insert or type in Word in upper or lower case: grave (Ì or ì), acute (Í or í), circumflex (Î or î) and umlaut (Ï or ï).
How to Insert or Type A with an Accent Mark in Word (À, Á, Â, Ä, à, á, â, or ä)
You can insert or type a with an accent mark in Word using built-in tools or keyboard shortcuts (including Alt code shortcuts). The letter a can be inserted with an accent in both upper or lower case. The following are common accented characters that you can insert or type in Word in upper or lower case: grave (À or à), acute (Á or á), circumflex (Â or â) and umlaut (Ä or ä).
10 Word Shortcuts to Select Text Using a Keyboard
You can use several shortcuts in Word to select text in your documents using only your keyboard. When you select text, it will typically be highlighted in grey. After you select text, you can cut, copy, or delete the selected text or apply character or paragraph formatting.
Microsoft, the Microsoft logo, Microsoft Office and related Microsoft applications and logos are registered trademarks of Microsoft Corporation in Canada, US and other countries. All other trademarks are the property of the registered owners.
Avantix Learning |18 King Street East, Suite 1400, Toronto, Ontario, Canada M5C 1C4 | Contact us at info@avantixlearning.ca


