Use the Eyedropper to Quickly Copy Colors from Pictures in Microsoft PowerPoint
by Avantix Learning Team | Updated October 24, 2021
Applies to: Microsoft® PowerPoint® 2013, 2016, 2019 and 365 (Windows)
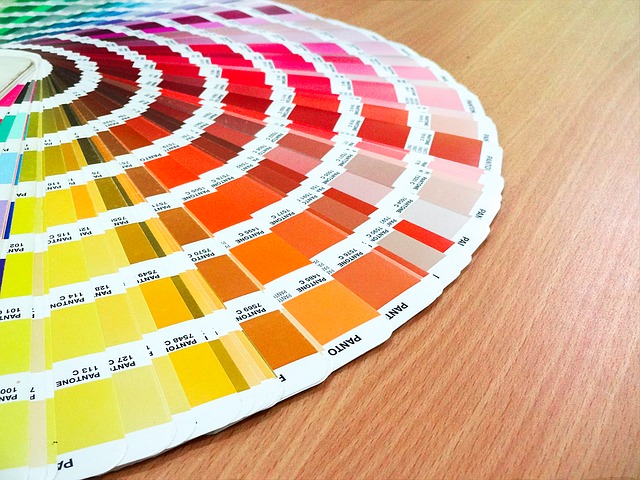
The Eyedropper (sometimes called the color picker) is one of those great timesaving tools that was added in PowerPoint without much fanfare. If you're designing presentations or templates and you'd like to use consistent colors (possibly your brand colors), it can take a lot of time to match colors. However, starting with PowerPoint 2013, you can now pick up and apply specific colors quickly and easily from pictures in a presentation or even web sites using the Eyedropper. The pictures can be in any format.
Note: Buttons and Ribbon tabs may display in a different way (with or without text) depending on your version of PowerPoint, the size of your screen and your Control Panel settings. For PowerPoint 365 users, Ribbon tabs may appear with different names. For example, the Picture Tools Format tab may appear as Picture Format and the Drawing Tools Format tab may appear as Drawing Format or Shape Format.
Recommended article: How to Quickly Remove All Animations in PowerPoint
Do you want to learn more about PowerPoint? Check out our virtual classroom or live classroom PowerPoint courses >
Where to find the Eyedropper
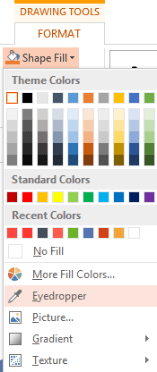
The Eyedropper appears in any drop-down menu (in PowerPoint 2013 or later versions) that you use to pick a color. This includes Shape Fill, Shape Outline, Text Fill and Text Outline.
Below is the Shape Fill drop-down menu with the Eyedropper:
Use the Eyedropper to pick up a color from a picture in PowerPoint and apply it to a shape
To pick up a specific color in a picture and use the color for a shape fill or outline in PowerPoint:
- In Normal View, select a shape on a slide to which you want to apply a matching color.
- Click the Drawing Tools Format, Drawing Format or Shape Format tab in the Ribbon.
- Click the arrow beside Shape Fill or Shape Outline. A drop-down menu appears.
- Select Eyedropper.
- Move the mouse pointer (Eyedropper) over the picture. A color will appear in the preview window beside the Eyedropper pointer.
- Keep moving the mouse over the picture until you see the color you want to use.
- Click the desired color. PowerPoint will apply it to the shape as the color for the fill or outline.
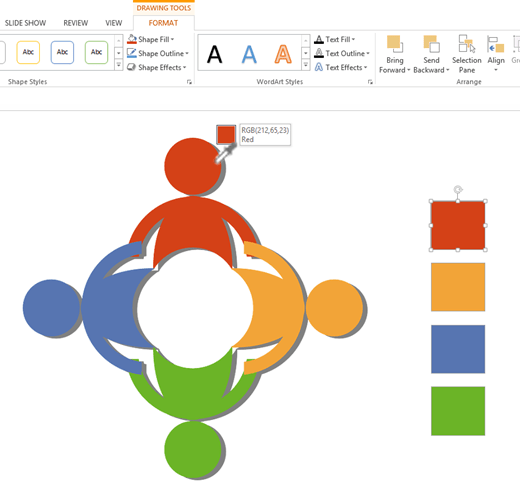
When you move your pointer over different colors, the preview window displays the color and its RGB (Red Green Blue) color values if you pause on the color for a few seconds. To choose the exact color you want when many colors are close together, select the color by pressing Enter or the space bar.
Note the Eyedropper preview window in the sample below:
Cancel the Eyedropper
To cancel the eyedropper without picking a color, press ESC (Escape).
Use the Eyedropper to pick up a color from an external picture or application and apply it to a shape
To match the color of an external picture or application and apply it to a shape:
- Resize the PowerPoint window so that you can view the window of the other application. You could do this by clicking the Restore button on the top right of the PowerPoint window.
- In PowerPoint, in Normal View, select the shape on a slide to which you want to apply a matching color.
- Click the Drawing Tools Format, Drawing Format or Shape Format tab in the Ribbon.
- Click the drop-down menu for the color you want to copy.
- Select Eyedropper.
- Left-click in the slide and drag your mouse (do not release the mouse button). You will now be able to move your mouse outside of the PowerPoint window.
- Hover over areas outside of the PowerPoint window until you see the color you want to use in the preview.
- Release the mouse on your desired color to apply that color to the selected shape.
Use the Eyedropper with text
The Eyedropper appears in the Font Color and Text Color drop-down menu on the Home tab in the Ribbon.
To use the Eyedropper to copy a color to the font color of text:
- Select the text and click the Home tab in the Ribbon.
- Click the arrow beside Font Color in the Font group. A drop-down menu appears.
- Select Eyedropper.
- Move the mouse pointer over the picture. A color will appear in the preview window beside the Eyedropper pointer.
- Keep moving the mouse over the picture until you see the color you want to use.
- Click the desired color. PowerPoint will apply it to the text as the color for the fill or outline.
Below is text with color matched from the picture on the left using Text Fill in the WordArt Styles group:
For precise color matching, the Eyedropper is a fantastic tool if you have PowerPoint 2013 or later versions.
This article was originally published on September 11, 2016 and has been updated for clarity and content.
Subscribe to get more articles like this one
Did you find this article helpful? If you would like to receive new articles, join our email list
More resources
10 PowerPoint Drawing Tricks and Shortcuts
How to Quickly Change Shapes in PowerPoint (2 Ways)
How to Make an Object Appear and Disappear in PowerPoint
How to Crop an Image into a Circle in PowerPoint (Crop to Shape Method)
How to Add Animation in PowerPoint (Animate Text, Images and Other Objects)
Related courses
Microsoft PowerPoint: Introduction
Microsoft PowerPoint: Intermediate / Advanced
Microsoft PowerPoint: Design for Non-Designers
Our instructor-led courses are delivered in virtual classroom format or at our downtown Toronto location at 18 King Street East, Suite 1400, Toronto, Ontario, Canada (some in-person classroom courses may also be delivered at an alternate downtown Toronto location). Contact us at info@avantixlearning.ca if you'd like to arrange custom instructor-led virtual classroom or onsite training on a date that's convenient for you.
Copyright 2024 Avantix® Learning
You may also like
How to Insert or Type E with an Accent Mark in PowerPoint (È, É, Ê, Ë, è, é, ê, or ë)
You can insert or type e with an accent mark in PowerPoint using built-in tools or keyboard shortcuts (including Alt code shortcuts). The letter e can be inserted with an accent in both upper or lower case in text boxes or placeholders on slides, the slide master or layouts. The following are common accents in upper or lower case – È, É, Ê, Ë, è, é, ê, or ë.
How to Fade a Picture or Part of a Picture in PowerPoint (Using a Gradient)
You can fade a picture in PowerPoint by drawing a rectangle shape on top of the picture and then filling the rectangle with a gradient from opaque to transparent. This technique is often used to fade an image into the background of a slide. Since the rectangle is placed on top of the image and then text may be placed on top of the rectangle, you may need to reorder the objects.
How to Lock an Image, Shape or Other Object in PowerPoint
You can now lock an image, shape or other object in PowerPoint. Objects can be locked in Normal View or Slide Master View. Only PowerPoint 365 users can lock objects to prevent moving and resizing. This is helpful if you want to select and move other objects on the slide or prevent others from moving or resizing an object. You can lock items using the context menu or the Selection Pane.
Avantix Learning | 1 Yonge Street, Suite 1801 (Toronto Star Building), Toronto, Ontario, Canada M5E 1W7 | info@avantixlearning.ca
Microsoft, the Microsoft logo, Microsoft Office and related Microsoft applications and logos are registered trademarks of Microsoft Corporation in Canada, US and other countries. All other trademarks are the property of the registered owners.
Avantix Learning |18 King Street East, Suite 1400, Toronto, Ontario, Canada M5C 1C4 | Contact us at info@avantixlearning.ca


