Create and Format Newspaper-style Columns in Word Documents
by Avantix Learning Team | Updated September 6, 2022
Applies to: Microsoft® Word® 2013, 2016, 2019, 2021 and 365 (Windows)
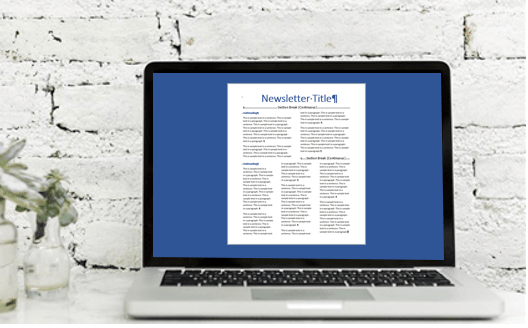
You can make columns in Word documents in a few different ways. There are two types of columns you can create – newspaper-style columns where the text flows from column to column or tables with columns and rows. You can create documents that contain two, three or more columns. In this article, we'll review how to set up newspaper-style columns. If you want to create a table, check out 4 Ways to Create a Table in Word.
The best way to create and manage newspaper-style columns is to create them in sections. In Word, each section can contain a different number of columns. You could, for example, create a two section document if you want a heading to span the top of a document in one column and the remaining text in two, three or more columns.
Note: Buttons and Ribbon tabs may display in a different way (with or without text) depending on your version of Word, the size of your screen and your Control Panel settings. For newer versions of Word, Ribbon tabs may appear with different names. For example, the Layout tab may appear as Page Layout.
Recommended article: 10 Microsoft Word Tips, Tricks and Shortcuts for Selecting in Tables
Create columns (basic method)
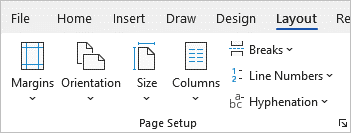
The Columns command appears on the Layout or Page Layout tab in the Ribbon:
To create newspaper-style columns in a Word document:
- Click in the document where you want to create columns.
- Click the Layout or Page Layout tab in the Ribbon.
- Click Columns in the Page Setup group. A drop-down menu appears.
- Click one of the column options (such as Two) or click More Columns. If you click More Columns, a dialog box appears.
- In the dialog box, click or enter the number of columns you want.
- If you don't want your columns to all be the same width, uncheck or deselect the Equal column width checkbox (you will then be able to change the width of each column separately).
- Enter a width for each column if you want.
- In the area to the right of each column below Spacing, enter a gap amount if you want (gap is the space between the columns).
- Beside Apply To, select your preferred option – Whole document, This point forward, Selected text, or This section. This section appears only if you have inserted a section break. Selected text appears if you have selected text.
- Click OK.
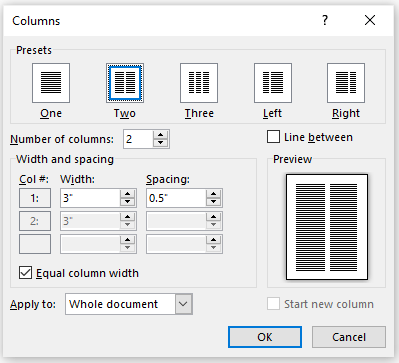
The Columns dialog box appears as follows with 2 columns and Equal column width selected:
Insert a section to contain multiple columns
If you create sections to contain columns, you can combine different numbers of columns in your document (and easily return to one column). The default in a Word document is one section.
It's a good idea to turn on Show / Hide Paragraph Marks when working with sections so you can see section breaks and other non-printing characters.
To turn on Show / Hide Paragraph Marks:
- Click the Home tab in the Ribbon.
- Click Show/Hide ¶ in the Paragraph group. Paragraph marks, tabs, spacing and section breaks will display but will not print.
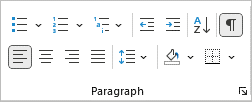
The Show/Hide ¶ command appears on the Home tab in the Ribbon in the Paragraph group:
To insert a section to contain columns:
- Click in the Word document where you want to insert the section break.
- Click the Layout or Page Layout tab in the Ribbon.
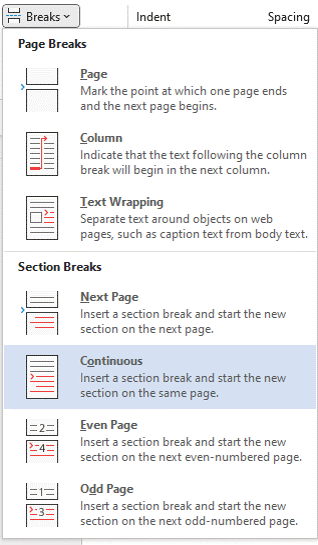
- Click Breaks in the Page Setup group. A drop-down menu appears.
- Click the type of break you want. Typically, you would choose Continuous.
- Add another break (typically Continuous) at the end of the area where you want to end the columns.
The Breaks command appears on the Layout or Page Layout tab in the Ribbon:
Create columns in a section
To create columns in a section in a Word document:
- Click in the section where you want to create columns. There should be a section break at the beginning and end of this area.
- Complete steps 2-8 of the Create columns (basic method) using the dialog box.
- Beside Apply To, select This Section.
- Click OK.
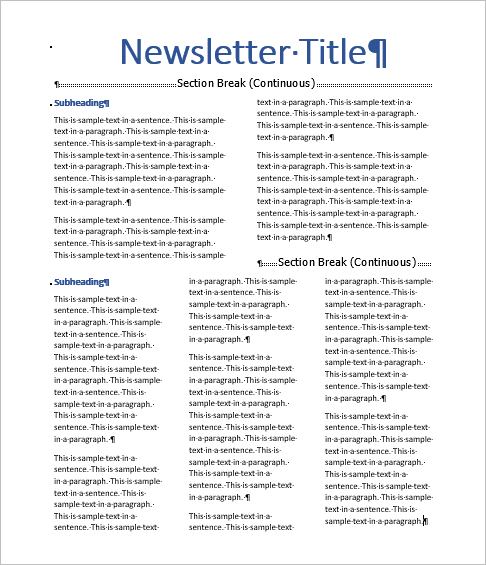
In the following example, a document has been set up with 3 sections, each with a different number of columns:
Create columns for selected text
Another way to create columns is to select text and change it to columns.
To create columns for selected text:
- Select the text you want to change to multiple columns.
- Complete steps 2-8 of the Create columns (basic method) using the dialog box.
- Beside Apply To, Selected Text should appear.
- Click OK.
Create columns from a specific point in a document
You can also create columns starting at a specific location in a document.
To create columns starting at a specific point in a document:
- Click in the location in the Word document where you want to start columns.
- Complete steps 2-8 of the Create columns (basic method) using the dialog box.
- Beside Apply To, select This Point Forward.
- Click OK.
Insert a column break
If you have created multiple columns, you may want to add a column break to force a new column.
To insert a column break:
- Click in the Word document where you want to insert a column break.
- Click the Layout or Page Layout tab in the Ribbon.
- Click Breaks in the Page Setup group. A drop-down menu appears.
- Click Column.
You can also create a column break by pressing Ctrl + Shift + Enter.
When you insert a column break, the cursor will appear in the next column.
View column boundaries
You can display column boundaries when you are working with newspaper-style columns.
To display column boundaries:
- Click the File tab in the Ribbon.
- Click Options. A dialog box appears.
- Click Advanced in the categories on the left.
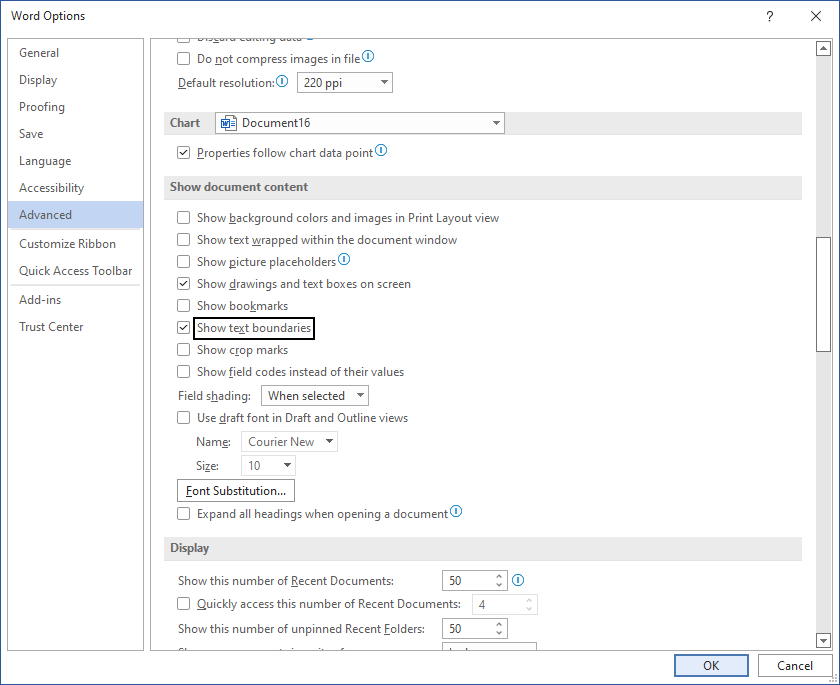
- Check or select Show text boundaries in the Show document content group.
- Click OK.
View column boundaries appears in the Options dialog box in Word:
Remove columns in a section
To remove columns in a section:
- Click in the section with the columns you want to remove.
- Click the Layout or Page Layout tab in the Ribbon.
- Click Columns in the Page Setup group. A drop-down menu appears.
- Click One.
At this point, you can select and delete the section breaks if you want.
Remove columns for selected text
To remove columns for selected text:
- Select the text with the columns you want to remove.
- Click the Layout or Page Layout tab in the Ribbon.
- Click Columns in the Page Setup group. A drop-down menu appears.
- Click One.
If you want to remove all newspaper-style columns in a document, press Ctrl + A for select all and then select One in the Columns drop-down menu.
Remove columns starting at a specific point in a document
To remove columns starting at a specific point in a document:
- Click in the location in the Word document where you want to remove columns.
- Click the Layout or Page Layout tab in the Ribbon.
- Click Columns in the Page Setup group. A drop-down menu appears.
- Click More Columns. A dialog box appears.
- In the dialog box, select One.
- Beside Apply To, select This Point Forward.
- Click OK.
Remove section or column breaks
If you have turned on Show/Hide ¶ in the Paragraph group, section breaks and column breaks will appear in the document. Simply drag over a break to select it and press Delete.
Newspaper-style columns are very different from tables with columns and rows and are used for different purposes. They are most often used in newsletters but can be used in any type of document.
Subscribe to get more articles like this one
Did you find this article helpful? If you would like to receive new articles, JOIN our email list.
More resources
14 Shortcuts to Quickly Select Text in Microsoft Word
10 Microsoft Word Shortcuts for Moving Around in Tables
How to Keep a Microsoft Word Table Together on One Page
How to Insert, Format and Update Cross-References in Word
Microsoft Word Tricks to Keep Text Together (Words, Lines or Paragraphs)
Related courses
Microsoft Word: Intermediate / Advanced
Microsoft Excel: Intermediate / Advanced
Microsoft PowerPoint: Intermediate / Advanced
Microsoft Word: Long Documents Master Class
Microsoft Word: Styles, Templates and Tables of Contents
Microsoft Word: Designing Dynamic Word Documents Using Fields
Our instructor-led courses are delivered in virtual classroom format or at our downtown Toronto location at 18 King Street East, Suite 1400, Toronto, Ontario, Canada (some in-person classroom courses may also be delivered at an alternate downtown Toronto location). Contact us at info@avantixlearning.ca if you'd like to arrange custom instructor-led virtual classroom or onsite training on a date that's convenient for you.
Copyright 2024 Avantix® Learning
You may also like
How to Insert or Type I with an Accent Mark in Word (Í, í, Ì, ì, Î, î, Ï, or ï)
You can insert or type i with an accent mark in Word using built-in tools or keyboard shortcuts (including Alt code shortcuts). The letter i can be inserted with an accent in both upper or lower case. The following are common accented characters that you can insert or type in Word in upper or lower case: grave (Ì or ì), acute (Í or í), circumflex (Î or î) and umlaut (Ï or ï).
How to Insert or Type A with an Accent Mark in Word (À, Á, Â, Ä, à, á, â, or ä)
You can insert or type a with an accent mark in Word using built-in tools or keyboard shortcuts (including Alt code shortcuts). The letter a can be inserted with an accent in both upper or lower case. The following are common accented characters that you can insert or type in Word in upper or lower case: grave (À or à), acute (Á or á), circumflex (Â or â) and umlaut (Ä or ä).
10 Word Shortcuts to Select Text Using a Keyboard
You can use several shortcuts in Word to select text in your documents using only your keyboard. When you select text, it will typically be highlighted in grey. After you select text, you can cut, copy, or delete the selected text or apply character or paragraph formatting.
Microsoft, the Microsoft logo, Microsoft Office and related Microsoft applications and logos are registered trademarks of Microsoft Corporation in Canada, US and other countries. All other trademarks are the property of the registered owners.
Avantix Learning |18 King Street East, Suite 1400, Toronto, Ontario, Canada M5C 1C4 | Contact us at info@avantixlearning.ca
