How to Quickly Select Cells, Rows, Columns and Entire Tables in Microsoft Word
by Avantix Learning Team | Updated August 21, 2022
Applies to: Microsoft® Word® 2010, 2013, 2016, 2019, 2021 and 365 (Windows)
There are many different ways of selecting in tables in Microsoft Word. Check out these Word tips, tricks and shortcuts to select an entire table, a single cell, an entire row or column or even multiple rows or columns in tables.
Recommended article: 10 Microsoft Word Shortcuts for Moving Around in Tables
Do you want to learn more about Microsoft Word? Check out our virtual classroom or live classroom Word courses >
1. Select an entire table using a mouse
To select an entire table, move your mouse over the table until an icon with 4 arrows appears in the upper-left corner of the table and then click the icon to select the entire table.
Below is the table selection icon which appears on the top left of tables:
2. Select an entire table using a keyboard and mouse
If your press Alt and double-click anywhere in a table, the entire table will be selected (Word also opens the Research pane).
3. Select an entire table using a keyboard
To select an entire table using a keyboard, position the cursor in the first cell of the table. Press Alt + Shift + End on your keyboard to select to the end of the first row and then press Alt + Shift + Page Down to select to the last cell.
4. Select a cell using a mouse
To select an individual cell, move the mouse to the left side of the cell until it turns into a black right arrow and then click to select the cell.
5. Select a cell using a keyboard
To use the keyboard to select a cell, position the cursor at the beginning of the cell and then press Shift + right arrow on your keyboard. Keep pressing Shift + right arrow until the entire cell is selected.
6. Select a row or rows using a mouse
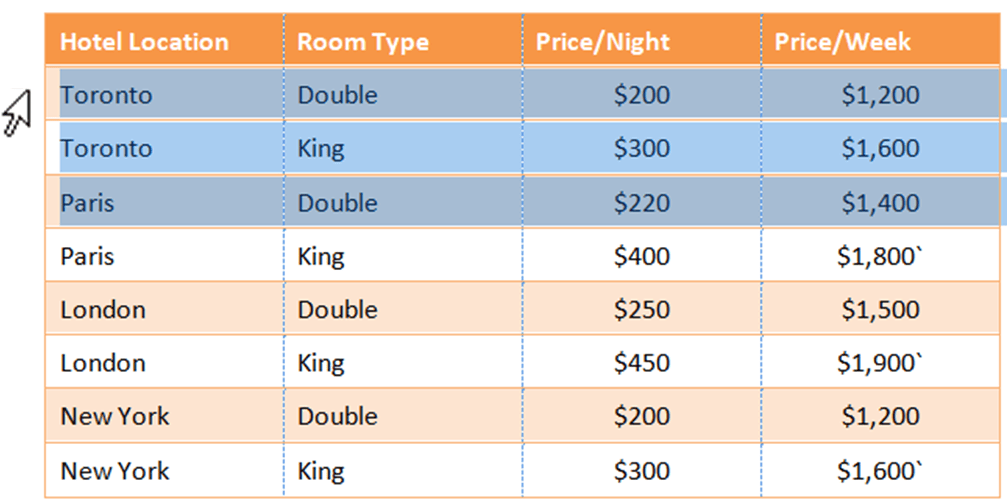
To select a row in a table, move the cursor to the left of the row until it changes into a right arrow. Click to select the current row or drag up to down to select multiple rows.
Below is the right arrow that appears when you position your cursor to the left of rows and is used for selecting rows in tables:
7. Select rows using a mouse and keyboard
To select multiple contiguous rows, move the cursor to the left of the first row until it changes into a white right arrow and then click to select the row. Press Shift and click with the white right arrow on the last row you want to select.
To select multiple non-contiguous rows, move the cursor to the left of the first row until it changes into a white right arrow and then click to select the row. Press Ctrl and click with the white right arrow on subsequent rows.
8. Select a row or column using a keyboard
To select a row using a keyboard, position the cursor in the first cell of the row you want to select and then press Alt + Shift + End on your keyboard to select to the end of the row.
To select a column using a keyboard, position the cursor in the first cell of the column you want to select and then press Alt + Shift + Page Down on your keyboard to select to the end of the column.
9. Select a column or columns using a mouse
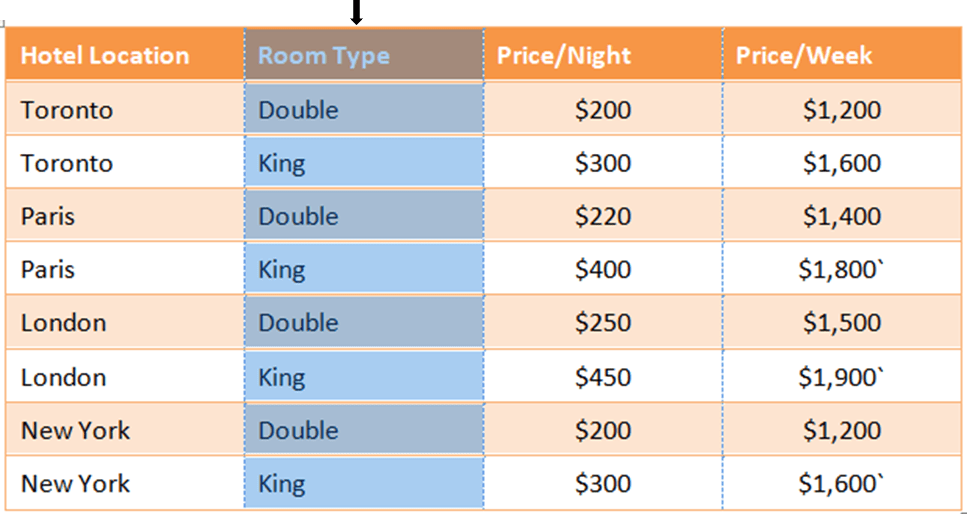
To select a column in a table, move the cursor to the top of the column until it changes into a down arrow. Click to select the current column or drag right or left to sele9.ct multiple columns.
Below is the down arrow that appears when you position your cursor at the top of a column and is used for selecting columns in tables:
10. Select columns using a mouse and keyboard
To select multiple contiguous columns, move the cursor to the top of the first column until it changes into a black down arrow and then click to select the column. Press Shift and click with the black down arrow on the last column you want to select.
To select multiple non-contiguous columns, move the cursor to the top of the first column until it changes into a black down arrow and then click to select the column. Press Ctrl and click with the black down arrow on subsequent columns.
Subscribe to get more articles like this one
Did you find this article helpful? If you would like to receive new articles, JOIN our email list.
More resources
4 Ways to Create a Table in Word
14 Shortcuts to Quickly Select Text in Microsoft Word
How to Insert, Format and Update Cross-References in Word
Microsoft Word Tricks to Keep Text Together (Words, Lines or Paragraphs)
How to Format Microsoft Word Tables Using Table Styles (Ultimate Guide)
Related courses
Microsoft Word: Intermediate / Advanced
Microsoft Excel: Intermediate / Advanced
Microsoft PowerPoint: Intermediate / Advanced
Microsoft Word: Long Documents Master Class
Microsoft Word: Styles, Templates and Tables of Contents
Microsoft Word: Designing Dynamic Word Documents Using Fields
Our instructor-led courses are delivered in virtual classroom format or at our downtown Toronto location at 18 King Street East, Suite 1400, Toronto, Ontario, Canada (some in-person classroom courses may also be delivered at an alternate downtown Toronto location). Contact us at info@avantixlearning.ca if you'd like to arrange custom instructor-led virtual classroom or onsite training on a date that's convenient for you.
Copyright 2024 Avantix® Learning
You may also like
How to Insert or Type I with an Accent Mark in Word (Í, í, Ì, ì, Î, î, Ï, or ï)
You can insert or type i with an accent mark in Word using built-in tools or keyboard shortcuts (including Alt code shortcuts). The letter i can be inserted with an accent in both upper or lower case. The following are common accented characters that you can insert or type in Word in upper or lower case: grave (Ì or ì), acute (Í or í), circumflex (Î or î) and umlaut (Ï or ï).
How to Insert or Type A with an Accent Mark in Word (À, Á, Â, Ä, à, á, â, or ä)
You can insert or type a with an accent mark in Word using built-in tools or keyboard shortcuts (including Alt code shortcuts). The letter a can be inserted with an accent in both upper or lower case. The following are common accented characters that you can insert or type in Word in upper or lower case: grave (À or à), acute (Á or á), circumflex (Â or â) and umlaut (Ä or ä).
10 Word Shortcuts to Select Text Using a Keyboard
You can use several shortcuts in Word to select text in your documents using only your keyboard. When you select text, it will typically be highlighted in grey. After you select text, you can cut, copy, or delete the selected text or apply character or paragraph formatting.
Microsoft, the Microsoft logo, Microsoft Office and related Microsoft applications and logos are registered trademarks of Microsoft Corporation in Canada, US and other countries. All other trademarks are the property of the registered owners.
Avantix Learning |18 King Street East, Suite 1400, Toronto, Ontario, Canada M5C 1C4 | Contact us at info@avantixlearning.ca


