Print PowerPoint Presentations with Speaker Notes
by Avantix Learning Team | Updated January 25, 2026
Applies to: Microsoft® PowerPoint® 2016, 2019, 2021, 2024 and 365 (Windows)
You can print PowerPoint presentations with notes with or without slide thumbnails. You can control the way notes or speaker notes are printed in three ways – by editing the Notes Master which affects all slides, by editing single notes pages in Notes Page view or by changing formatting in the Notes pane in Normal View.
Contents
- Work with notes in different views
- Move between different views
- Print a PowerPoint presentation with notes and slide thumbnails
- Print a PowerPoint presentation with notes but without slide thumbnails (notes only)
- Resize the notes area of a single notes page
- Resize the notes area of all notes pages
- Add objects on a single notes page
- Change font size for all notes pages
- Print a logo on all notes pages
- Print headers and footers on all notes pages
Recommended article: How to Export PowerPoint Speaker Notes to Microsoft Word
Do you want to learn more about PowerPoint? Check out our virtual classroom or in-person PowerPoint courses >
Work with notes in different views
In Notes Master View, you can control the position and formatting of all notes pages and add or edit headers, footers, dates, page numbers and even company logos.
In Notes Page View, you can control the position and formatting of single notes pages and you can also add other objects such as shapes, pictures, tables, charts and SmartArt.
You can't draw shapes or insert pictures in the Notes pane in Normal View but you can draw shapes or add pictures in Notes Page View. Pictures and other objects that you add in Notes Page View appear on printed notes pages but not in Normal View.
Formatting changes made in different views in PowerPoint will appear in the preview area when you click the File tab in the Ribbon, select Print and then choose the option to print Notes Pages.
Move between different views
To move between different views, use the View tab in the Ribbon as shown below:

Print a PowerPoint presentation with notes and slide thumbnails
To print a PowerPoint presentation with notes and slide thumbnails (one per page):
- Click the File tab in the Ribbon and then click Print.
- Under Settings, click the arrow next to Full Page Slides and then in the Print Layout area, click Notes Pages. The preview on the right will display the current notes page. If you've inserted headers, footers, page numbers and a company logo, they will display in the preview. Formatting and any objects you've added in Notes Page view will also appear.
- To specify the page orientation, click the arrow next to Portrait Orientation and then click Portrait Orientation or Landscape Orientation.
- If you want to print your notes and slide thumbnails in color, select a color printer, click the arrow next to Color and then click Color.
- Select any other options you'd like in the Settings area.
- Click Print.
Below are the PowerPoint Print settings:

Print a PowerPoint presentation with notes but without slide thumbnails (notes only)
If you want to print the presentation without the default slide thumbnails, you will need to delete the thumbnail for each slide in its Notes Page. Before proceeding, you may want to make a copy of your presentation and work in the copy.
To print a PowerPoint presentation with notes but without slide thumbnails:
- In Normal View, display the slide with the thumbnail you want to delete.
- Click the View tab in the Ribbon and in the Presentation Views group, click Notes Page.
- To delete the slide thumbnail on the notes page, click the slide thumbnail and then press Delete.
- Repeat for each slide.
- Click the File tab in the Ribbon and then click Print.
- Under Settings, click the arrow next to Full Page Slides and then in the Print Layout area, click Notes Pages. The preview on the right will display the current notes page. If you've inserted headers, footers, page numbers and a company logo, they will display in the preview. Formatting and any objects you've added in Notes Page view will also appear.
- To specify the page orientation, click the arrow next to Portrait Orientation and then click Portrait Orientation or Landscape Orientation.
- If you want to print your notes and slide thumbnails in color, select a color printer, click the arrow next to Color and then click Color.
- Select any other options you'd like in the Settings area.
- Click Print.
Resize the notes area of a single notes page
A default notes page consists of a slide thumbnail on the top half of the page and a section of the same size for notes on the bottom of the page. If you'd like to increase the space for your notes, you can resize these areas.
To increase the space for notes for a single notes page:
- In Normal View, display the slide to which you want to increase the space for notes.
- Click the View tab in the Ribbon and in the Presentation Views group, click Notes Page.
- If you want to increase or decrease the size of the slide thumbnail or notes placeholder on the notes page, drag a sizing handle on the slide thumbnail or notes placeholder in the same way that you would resize other PowerPoint objects. Use a corner handle when resizing the slide thumbnail so you do not distort it. You do not need to use a corner sizing handle for the notes placeholder.
- If you need to move the slide thumbnail or notes placeholder, click the border (not a handle) of the thumbnail or placeholder and drag or press the arrow keys on your keyboard.
- If you want to delete the slide thumbnail on the notes page, click the slide thumbnail and then press Delete.
Below is a default notes page in Notes Page View:

Add objects on a single notes page
You can add objects on a single notes page (which will print but will not appear in Normal View).
To add an object on a single notes page:
- In Normal View, display the slide to which you want to increase the space for notes.
- Click the View tab in the Ribbon and in the Presentation Views group, click Notes Page.
- Click the Insert tab in the Ribbon and add the desired shape, picture, table, chart or SmartArt.
- Resize and format the object as necessary.
- Move the object to the desired location.
Resize the notes area of all notes pages
You can also resize the notes area of all notes page using the Notes Master:
- Click the View tab in the Ribbon and in the Master Views group, click Notes Master.
- If you want to increase or decrease the size of the slide thumbnail or notes placeholder on the notes page, drag a sizing handle on the slide thumbnail or notes placeholder in the same way that you would resize other PowerPoint objects. Use a corner handle when resizing the slide thumbnail so you do not distort it. You do not need to use a corner sizing handle for the notes placeholder.
- If you need to move the slide thumbnail or notes placeholder, click the border (not a handle) of the thumbnail or placeholder and drag or press the arrow keys on your keyboard.
Do not delete the slide thumbnail in the Notes Master View as it has no effect and will still preview.
Below is the default notes page in Notes Master View:

Change font size for all notes pages
You can change font size in the Notes Pages View or in the Notes pane in Normal View. However, to change the font size for the notes for all notes pages:
- Click the View tab in the Ribbon and in the Master Views group, click Notes Master.
- Select the desired level in the notes outline and change the font size. You can change the font size using the font size menu in the Home tab in the Ribbon or by right-clicking and selecting a font size in the mini toolbar that appears.
It's best to change the font by changing the font theme through the Design tab in the Ribbon (this is hidden in the Variants drop-down gallery in 2013 and later versions of PowerPoint). If you change the font theme, this will affect the entire presentation (both slides and notes) and is best set when you first create your presentation. Otherwise, users may manually apply fonts on each slide which would override the theme.
Print a logo on all notes pages
To add an object such as a logo to all the notes pages in your presentation (and print it), you will need to edit the Notes Master:
- Click the View tab in the Ribbon and in the Master Views group, click Notes Master.
- Click the Insert tab in the Ribbon and click Picture(s).
- Navigate to the folder with the picture / logo you want to insert and double-click it.
- Resize the picture by dragging its handles.
- Position the picture by dragging it (usually by its middle area).
It's best not to delete placeholders (such as header and footer) to accommodate the logo. Instead, move the placeholders to an alternate location.
Print headers and footers on all notes pages
As long as placeholders appear in the Notes Master, you can insert slide numbers, a date and text using the Header & Footer command.
To print headers and footers on all notes pages (assuming you want to print notes only):
- Click the View tab in the Ribbon and click Notes Master in the Master Views group. Note the placeholders in this view. If necessary, move the placeholders to alternate locations by dragging their borders. It's best not to delete header, footer, date or page number placeholders.
- Click the Insert tab in the Ribbon and click Header & Footer in the Text group. A dialog box appears.
- If necessary, click the Notes and Handouts tab in the dialog box.
- Ensure the check box for Page number is checked. You can also check Header, Footer and Date if required. If you check Header and / or Footer, enter text you want to appear in the header or footer text boxes. This could include your company name, your name, your contact information and / or the name of the presentation.
- Click Apply to All.
Below is the Header & Footer dialog box:

You can also print PowerPoint speaker notes in a Microsoft Word document. If you'd like to explore this option, check out the article How to Export PowerPoint Speaker Notes to Microsoft Word.
This articles was first published on December 30, 2018 and has been updated for clarity and content.
Subscribe to get more articles like this one
Did you find this article helpful? If you would like to receive new articles, JOIN our email list.
More resources
How to Add and Format Notes in PowerPoint
How to Export PowerPoint Speaker Notes to Microsoft Word
How to Hide and Unhide Slides in PowerPoint (with Shortcuts)
How to Quickly Remove All Speaker Notes in PowerPoint (PC or Mac)
3 Ways to Change the Font on All Slides in a PowerPoint Presentation
Related courses
Microsoft PowerPoint: Intermediate / Advanced
Microsoft PowerPoint: Design for Non-Designers
Microsoft PowerPoint: Animations Bootcamp
Our instructor-led courses are delivered in virtual classroom format or at our downtown Toronto location at 18 King Street East, Suite 1400, Toronto, Ontario, Canada (some in-person classroom courses may also be delivered at an alternate downtown Toronto location). Contact us at info@avantixlearning.ca if you'd like to arrange custom instructor-led virtual classroom or onsite training on a date that's convenient for you.
Copyright 2025 Avantix® Learning
You may also like
How to Insert and Format Icons in PowerPoint
You can curve text in PowerPoint using WordArt Transform options on the Shape tab in the Ribbon. The text can be WordArt text or text in a text box or in a placeholder. Using Transform text effects, you can curve or bend selected text. The text can be curved around a circle or other shape if you want. Typically, curved text is inserted in Normal View and can be a word or a line of text.

How to Highlight or Draw on PowerPoint Slides During a Slide Show
You can highlight text in PowerPoint in many different ways. If you have PowerPoint 2019 or a later version, Text Highlight Color is available on the Home tab in the Ribbon. For those with older versions without a Highlight command in the Ribbon, you'll need to use other strategies to highlight text. In this article, we'll review five ways to highlight text in PowerPoint. Most of these strategies will work in all versions.
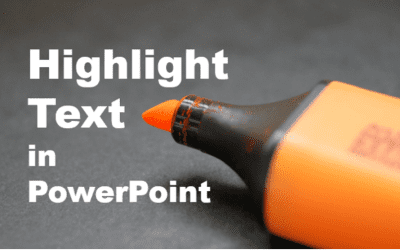
How to Highlight Text in PowerPoint (5 Ways)
You can highlight text in PowerPoint in many different ways. If you have PowerPoint 2019 or a later version, Text Highlight Color is available on the Home tab in the Ribbon. For those with older versions without a Highlight command in the Ribbon, you'll need to use other strategies to highlight text. In this article, we'll review five ways to highlight text in PowerPoint. Most of these strategies will work in all versions.
Image credit(s) / application screenshot(s): Microsoft
Microsoft, the Microsoft logo, Microsoft Office and related Microsoft applications and logos are registered trademarks of Microsoft Corporation in Canada, US and other countries. All other trademarks are the property of the registered owners.
Avantix Learning |18 King Street East, Suite 1400, Toronto, Ontario, Canada M5C 1C4 | Contact us at info@avantixlearning.ca