

Try Out These Useful Techniques in Microsoft Project Tables
by Avantix Learning Team | Updated October 14, 2021
Applies to: Microsoft® Project® 2010, 2013, 2016 and 2019 (Standard and Professional)
Tables are a core component of Microsoft Project. They appear in many views and display specific fields available in Project. The default tables that appear in the Tables drop-down menu on the View tab include:
- Entry
- Cost
- Hyperlink
- Schedule
- Tracking
- Variance
- Work
- Summary
- Usage
Each of these tables display a different set of fields and can be applied to different views.
Recommended article: 10 Timesaving Shortcuts in Microsoft Project's Gantt Chart View
Do you want to learn more about Microsoft Project? Check out our virtual classroom or live classroom Project courses >
The following are some helpful tips when working with tables.
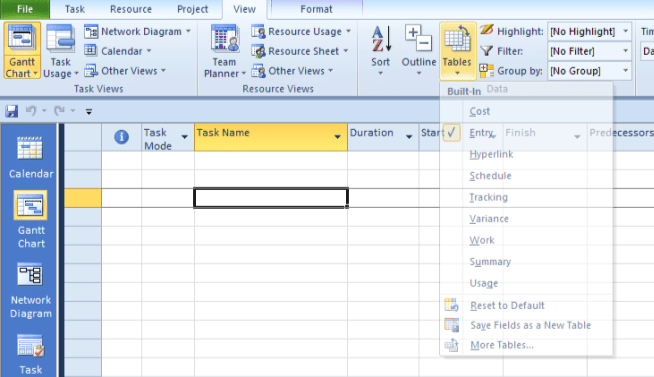
Apply a table to a view using the Ribbon
To apply a table to a view, display the desired view, click the View tab in the Ribbon and then select a table from the Tables drop-down menu.
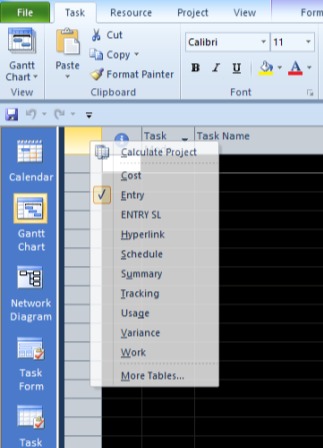
Apply a table to a view using a menu
To apply a table to a view using a menu, right-click the intersection point on the top left of the table (to the left of the first column and above the first row) and then select a table from the Tables drop-down menu.
Reset the Entry table
The Entry table is the default table that appears in the sheet area on the left in the Gantt Chart view. It also appears by default in many other task views. It can be confusing to some users if fields other than the default fields such as Duration, Start and Finish are displayed. It's a good idea to save a custom table if you want to display other fields.
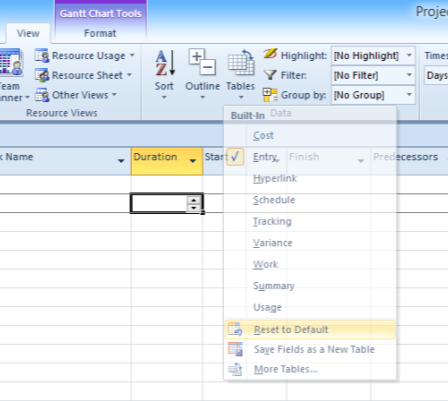
If the Entry table has been changed (new fields added or columns hidden), to reset the Entry table:
- Display the Entry table.
- If it's been modified, click the View tab on the Ribbon.
- Click Tables and from the drop-down menu, select Reset to Default.
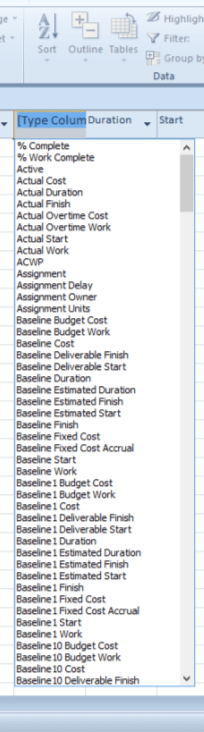
Add a column to a table
You can quickly add a column to a table by right-clicking a column heading, selecting Insert Column and then selecting a field. When the Field Name list is displayed, type the first letter of the desired field to go to that field and then click the field. Columns are inserted to the left.
Resize a column
To quickly resize a column in a table, double-click the right edge of a column heading to resize to best fit.
Rename a column
To quickly change the name of a column, double-click on the column heading, enter a new name for the field in the title area and press Enter. This creates a caption rather than applying a different field.
Hide a column
To quickly hide a column in a table, click the right edge of the column header and drag it to the left until it disappears. You can also right-click the column heading and select Hide Column from the drop-down menu.
Unhide a column
To display a column you've hidden, right-click a column heading, choose Insert Column and select the field you've hidden.
Resize the screen to view more fields
You can drag the dividing line between the table and the area on the right (usually a Gantt Chart) to display more fields in the table.
Save a custom table
If you have inserted and / or hidden columns, you can save the modified table as a custom table:
- Modify a table.
- Click the View tab in the Ribbon.
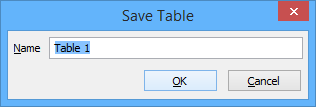
- From the Tables drop-down menu, select Save Fields as New Table.
- Enter a new name for the table and click OK. You will now be able to apply the table from the Tables drop-down menu on the View tab.
Try out these useful strategies to control the way you view tables in Project.
Subscribe to get more articles like this one
Did you find this article helpful? If you would like to receive new articles, JOIN our email list.
More resources
How to Create a Timeline in MIcrosoft Project
Auto vs Manual Scheduling in Microsoft Project
Send Microsoft Project Data to Excel with Visual Reports
10 Microsoft Project Tips for Working Efficiently with Tables
7 Microsoft Project Navigation and Selection Shortcuts in Task Lists
Related courses
Microsoft Project: Introduction
Microsoft Project: Intermediate / Advanced
Microsoft Project: Introduction to VBA (Visual Basic for Applications)
Our instructor-led courses are delivered in virtual classroom format or at our downtown Toronto location at 18 King Street East, Suite 1400, Toronto, Ontario, Canada (some in-person classroom courses may also be delivered at an alternate downtown Toronto location). Contact us at info@avantixlearning.ca if you'd like to arrange custom instructor-led virtual classroom or onsite training on a date that's convenient for you.
Copyright 2024 Avantix® Learning
You may also like

7 Microsoft Project Navigation and Selection Shortcuts in Task Lists
If you are working in Gantt Chart view, you can use these keyboard shortcuts to quickly move and select in your task list.
10 Microsoft Project Shortcuts to Zoom and Move Quickly in the Gantt Chart Timescale
Zoom in, out and move using these great shortcuts in the Microsoft Project Gantt Chart timescale. The timescale in the Gantt Chart view appears on the right side and displays units of time.

Auto vs Manual Scheduling in Microsoft Project
In newer versions of Microsoft Project, you have the option of scheduling tasks using manual or auto scheduling. In earlier versions, Microsoft Project used auto scheduling which takes advantage of Project's scheduling engine to schedule tasks.
Microsoft, the Microsoft logo, Microsoft Office and related Microsoft applications and logos are registered trademarks of Microsoft Corporation in Canada, US and other countries. All other trademarks are the property of the registered owners.
Avantix Learning |18 King Street East, Suite 1400, Toronto, Ontario, Canada M5C 1C4 | Contact us at info@avantixlearning.ca


