Check Out This New Way to Navigate in Microsoft Access
by Avantix Learning Team | Updated September 13, 2021
Applies to: Microsoft® Access® 2010, 2013, 2016, 2019 and 365 (Windows)
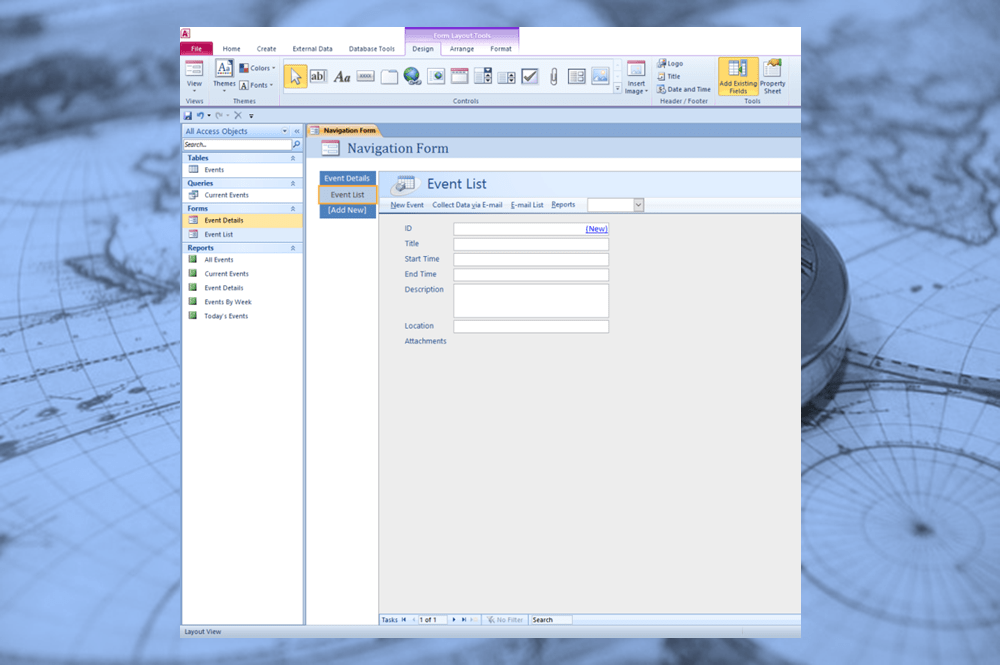
Starting in Microsoft Access 2010, you can create a new type of form called a navigation form which includes one or more navigation controls. Navigation forms can be used to quickly display forms and reports within a form. This type of form can be created for desktop Access databases but not Access web apps and you do not need to create any macros. To use the navigation form, ensure that you are viewing the form in Form View.
Recommended article 10 Techniques for Designing Forms in Microsoft Access
Creating a navigation form
To create a navigation form:
- Open the desktop database to which you want to add a navigation form.
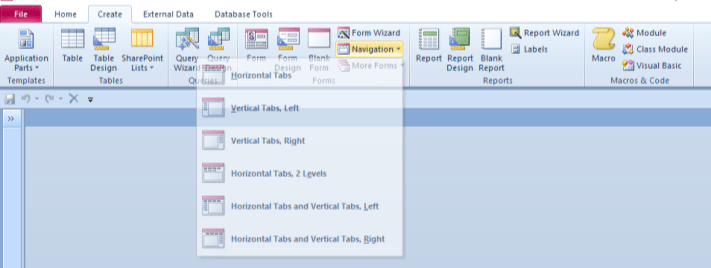
- Click the Create tab in the Ribbon.
- In the Forms group, click Navigation and then select the style of navigation form that you want from the drop-down menu. A form is created with one or more navigation controls and is displayed in Layout View.
Adding form or report buttons to a navigation form
To add a form or report button to a navigation form:
- If the Navigation Pane is not displayed, press F11 to display it.
- Ensure that the navigation form appears in Layout View by right-clicking the form in the Navigation Pane and selecting Layout View.
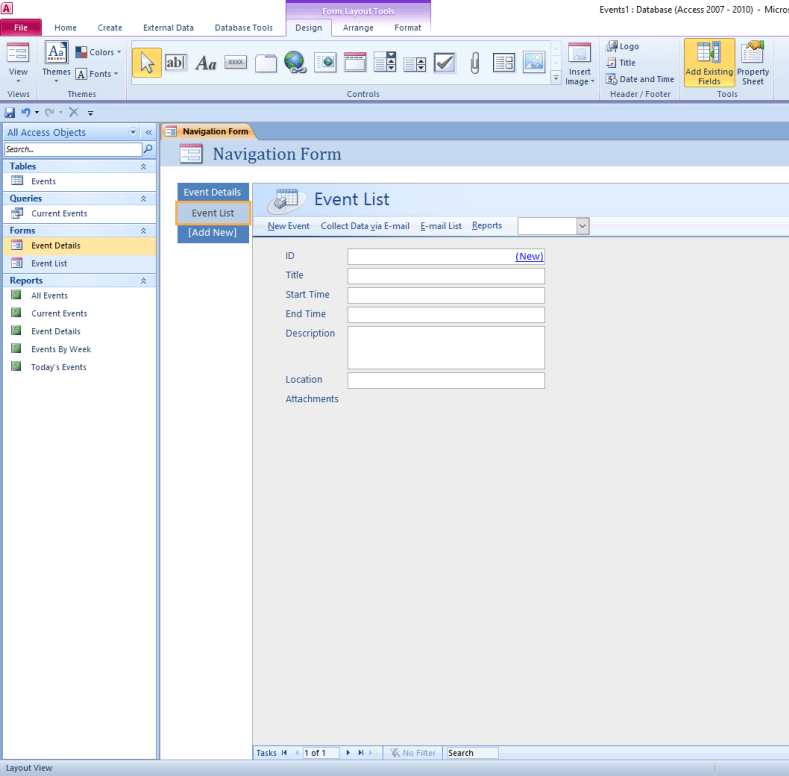
- Drag a form or report from the Navigation Pane onto the [Add New] button on the form. Access creates the new navigation button and displays the form or report in the object pane.
- Continue adding more forms or reports in the same way.
You will need to close and save the form before it will appear in the Navigation Pane.
Changing the title on the form
When you create a navigation form, the label "Navigation Form" is added to the form header by default.
To change the title (label) on the form:
- Open the navigation form in Layout View by right-clicking the form in the Navigation Pane and selecting Layout View. You can also edit the label in Design View.
- Click the label in the form header once to select it.
- Click the label again to place the cursor in the label.
- Enter a new title.
- Press Enter.
Editing the tab or window caption of the form
The form caption is the text that appears in the document tab of the form or in the window title bar if you have set the database to display objects as overlapping windows.
To edit the form caption:
- Open the navigation form in Layout View by right-clicking the form in the Navigation Pane and selecting Layout View. You can also edit the form caption in Design View.
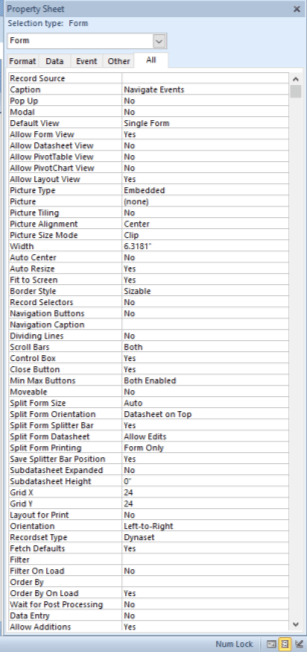
- Right-click in the form header and select Form Properties. If you are in Design View, right-click and select Properties. A Property Sheet appears.
- If necessary, click the Form Selector by clicking in the area at the top to the left of the Ruler.
- In the Property Sheet, click the All tab.
- Enter the caption title you'd like in the Caption property and press Enter.
Quickly format forms using themes
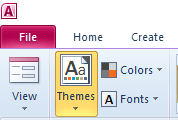
You can quickly format the form using themes. With themes, you can quickly change all of the colors and fonts that are used in a database. Themes apply to all objects in the database not just the current object.
To change the theme:
- Open any form or report in Layout or Design View by right-clicking on the form or report in the Navigation Pane and then selecting Layout View or Design View.
- Click the Form Design Tools Design tab in the Ribbon.
- In the Themes group, select a theme in the Themes Gallery to apply different color and font themes to the database. You can hover over each item to see a live preview of the theme and then click on one to apply it.
- To change colors only, choose a color theme from the Colors gallery.
- To change fonts only, choose a font theme from the Fonts gallery.
Quickly format navigation buttons
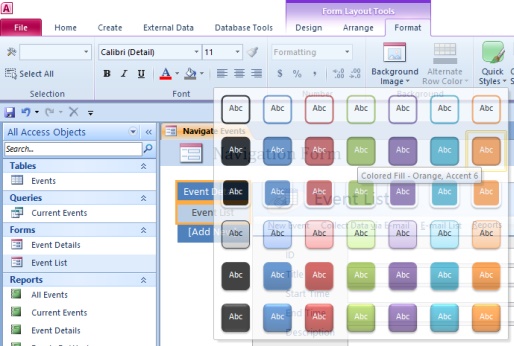
To quickly change the format of navigation buttons, you can use Quick Styles. You can apply unique styles to each button or apply the same style to all buttons.
To format buttons on a navigation form using Quick Styles:
- Open the navigation form in Layout View by right-clicking the form in the Navigation Pane and selecting Layout View. You can also edit the form in Design View.
- Select the navigation button that you want to change. You can Shift-click on multiple buttons.
- Click the Form Layout Tools Format tab in the Ribbon in Layout View or Form Design Tools Format tab in the Ribbon in Design View.
- In the Control Formatting group, select the styles you want to apply from the Quick Styles drop-down menu.
Setting a navigation form as the startup form
It's common to display this type of form whenever the desktop database is opened.
To display a navigation form as the startup form:
- Ensure that you have saved the form. To save a form, right-click the tab or title bar of the form and select Save. Enter a name if necessary and click OK.
- Click the File tab in the Ribbon.
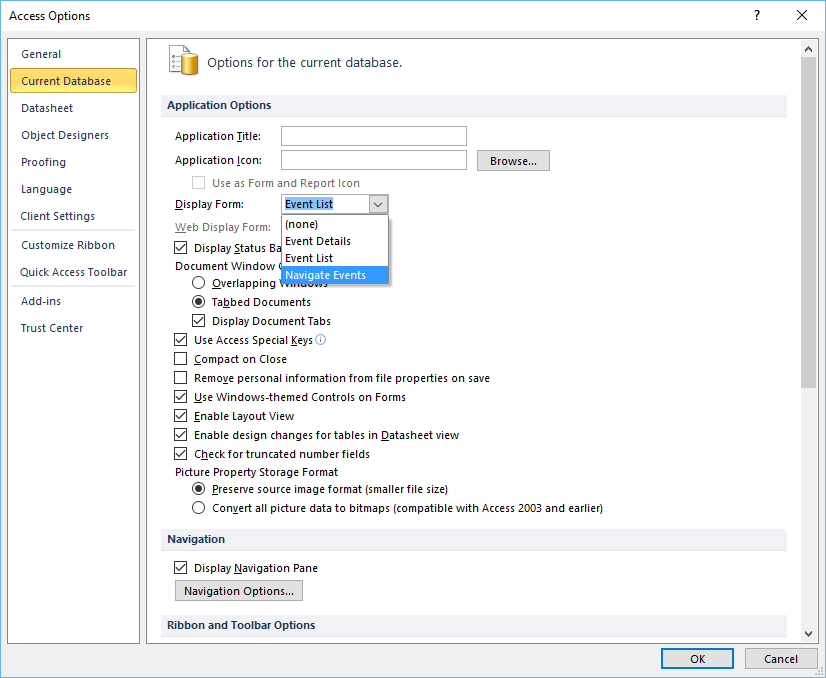
- Select Options. A dialog box appears.
- In the categories on the left, select Current Database.
- Under Application Options, select the navigation form from the Display Form list.
- Click OK.
If you are working with SharePoint, to set the default form that is displayed when you open the database on a SharePoint server, under Application Options, select the form from the Web Display Form list.
Subscribe to get more articles like this one
Did you find this article helpful? If you would like to receive new articles, join our email list.
More resources
How to Convert a Microsoft Access Report to PDF (3 Ways)
How to Filter a Report on the Fly in Microsoft Access
10 Techniques for Designing Forms in Microsoft Access
Related courses
Microsoft Access: Introduction
Microsoft Access: Intermediate / Advanced
Microsoft Access: Introduction to VBA (Visual Basic for Applications)
Our instructor-led courses are delivered in virtual classroom format or at our downtown Toronto location at 18 King Street East, Suite 1400, Toronto, Ontario, Canada (some in-person classroom courses may also be delivered at an alternate downtown Toronto location). Contact us at info@avantixlearning.ca if you'd like to arrange custom instructor-led virtual classroom or onsite training on a date that's convenient for you.
Copyright 2024 Avantix® Learning
You may also like
How to Highlight Records or Values in a Microsoft Access Report Using Conditional Formatting
Apply Conditional Formatting in Microsoft Access Reports by Avantix Learning Team | Updated October 14, 2022 Applies to: Microsoft® Access® 2010, 2013, 2016, 2019, 2021 and 365 (Windows) You can highlight values or records in a Microsoft Access report using...
How to Create a Calculated Field in a Microsoft Access Query
Create Calculated Fields in Microsoft Access Select Queries by Avantix Learning Team | Updated October 14, 2022 Applies to: Microsoft® Access® 2010, 2013, 2016, 2019, 2022 and 365 (Windows) You can create calculated fields in select queries in Microsoft Access in the...
10 Useful Microsoft Access Shortcuts When You're Working with Controls on Forms and Reports
Try These Shortcuts for Manipulating Controls in Design View in Microsoft Access by Avantix Learning Team | Updated October 14, 2022 Applies to: Microsoft® Access® 2010, 2013, 2016, 2019, and 365 (Windows) Controls are objects that appear in various sections in a...
Microsoft, the Microsoft logo, Microsoft Office and related Microsoft applications and logos are registered trademarks of Microsoft Corporation in Canada, US and other countries. All other trademarks are the property of the registered owners.
Avantix Learning |18 King Street East, Suite 1400, Toronto, Ontario, Canada M5C 1C4 | Contact us at info@avantixlearning.ca
