Print Word Documents without Comments (2 Easy Ways)
by Avantix Learning Team | Updated July 6, 2026
Applies to: Microsoft® Word® 2016, 2019, 2021, 2024 or 365 (Windows)
If you or another user have added comments in a Word document, you may want to print the document without comments. By default, when you print a Word document, comments are printed as well. There are a few ways you can print a Word document without printing the comments – hide the comments or change print settings. If you use either of these strategies, the comments are not deleted.
Contents
- About comments in Word
- Stop comments from printing by turning off markup
- Stop comments from printing by changing Print options
- Final thoughts
Recommended article: How to Hide Comments in Word (or Display Them)
Do you want to learn more about Microsoft Word? Check out our virtual classroom or live classroom Word courses >
About comments in Word
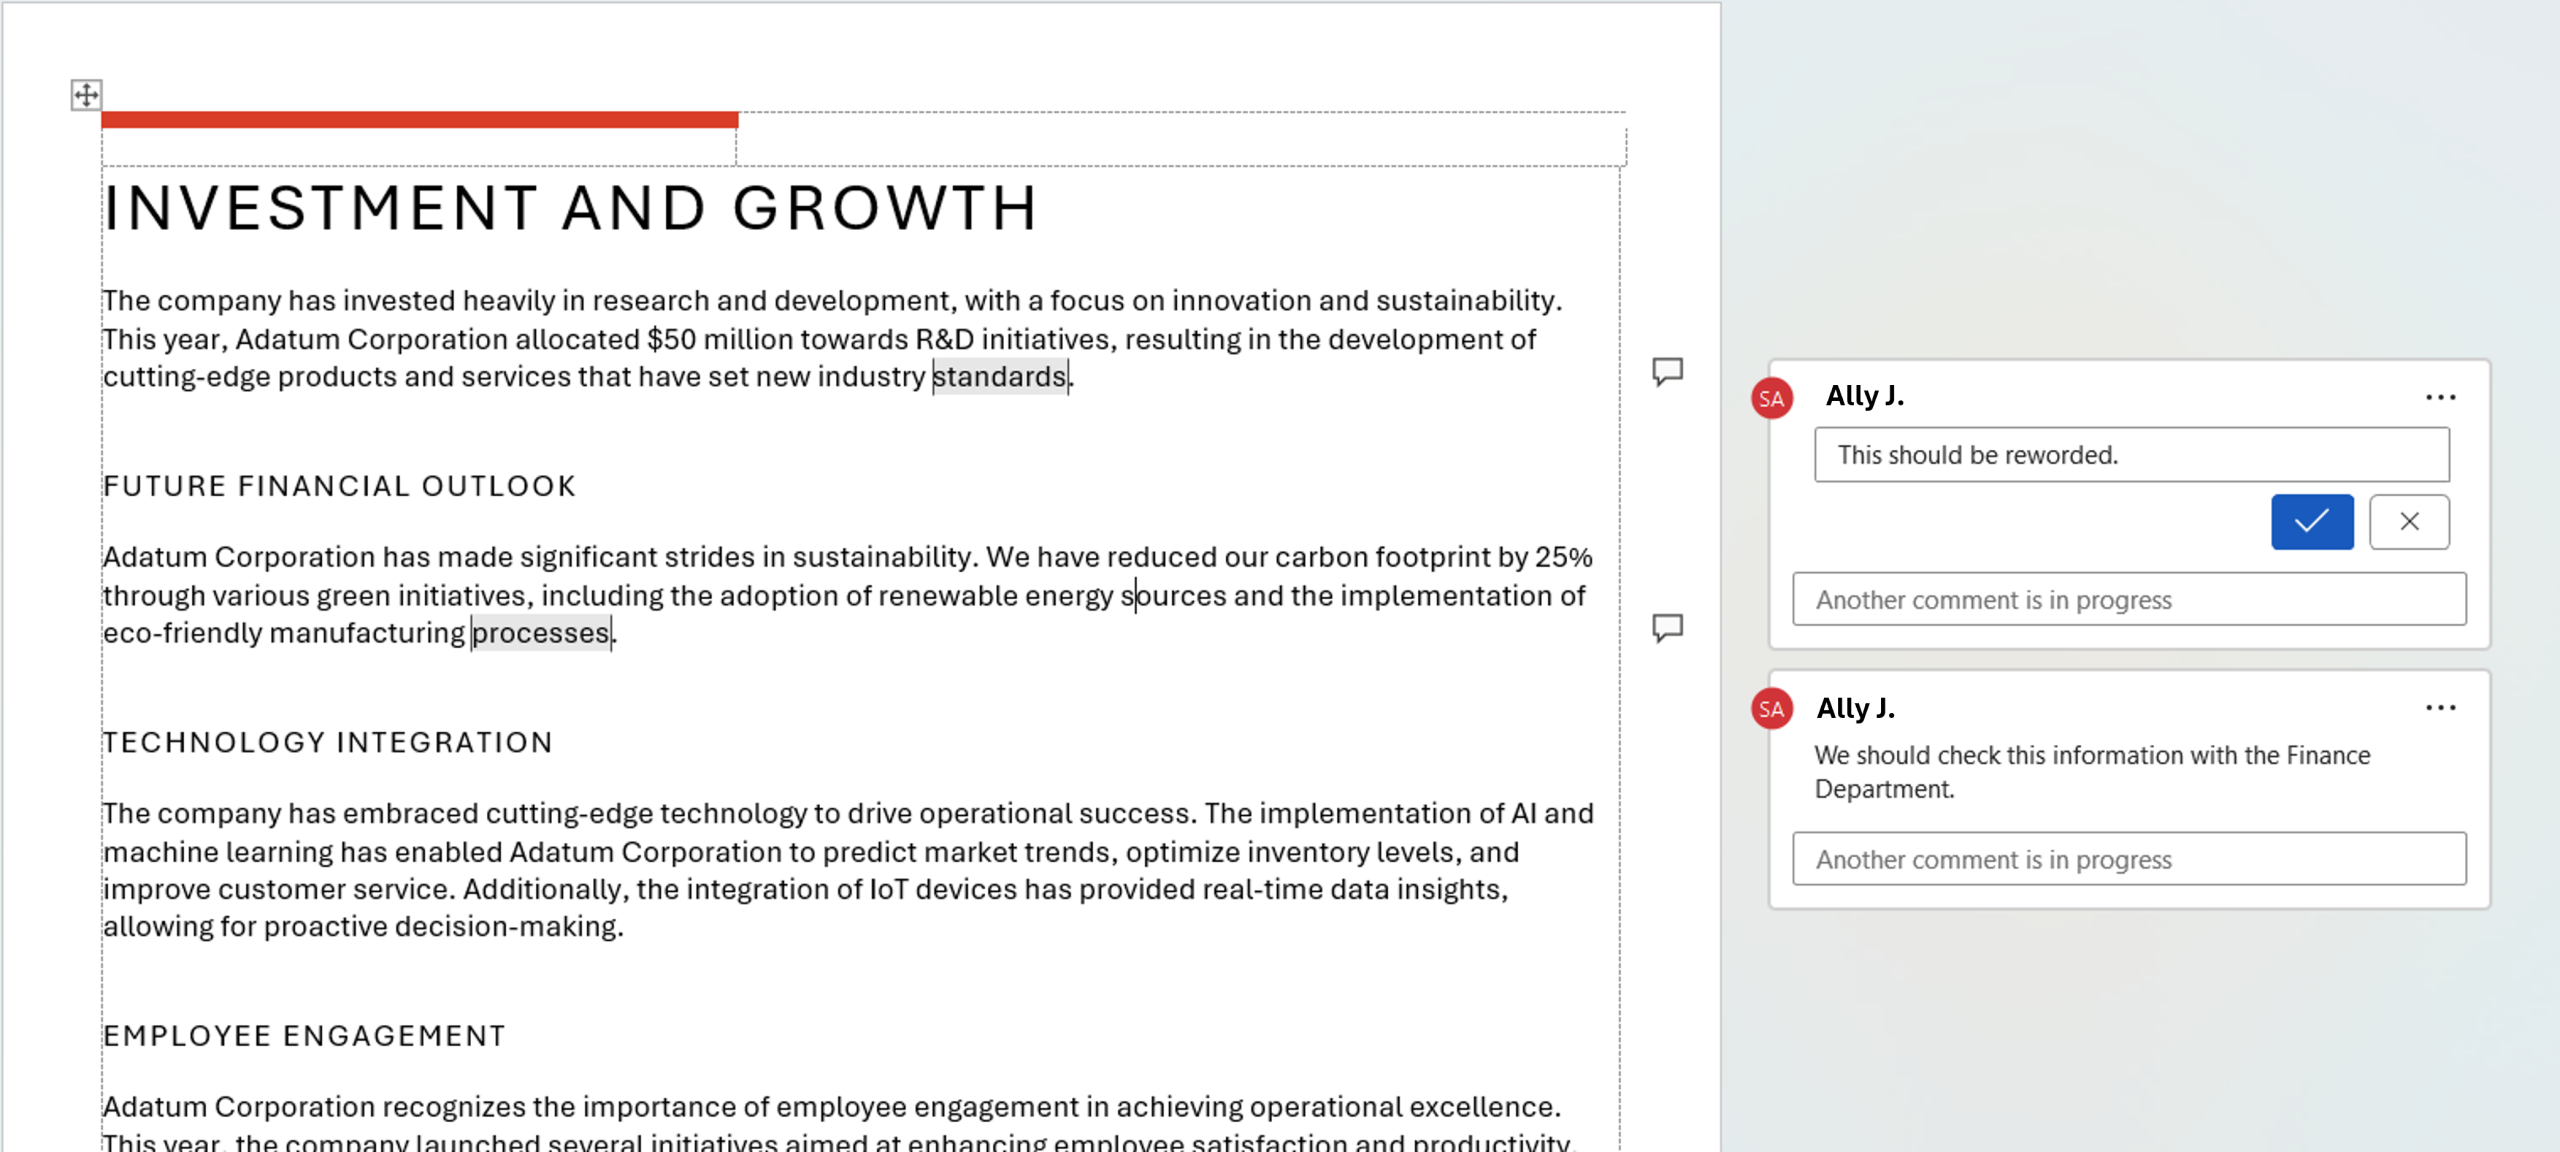
When you insert comments in Word, they will display as markup and print by default. If you change the markup display, you can view a document with or without the comments.
In the example below, comments appear in the right panel in the document:
Stop comments from printing by turning off markup
You can print a document without comments by hiding markup.
To turn off markup, including comments, and print a Word document:
- Open the Word document containing comments. Comments should appear in the panel on the right.
- Click the Review tab in the Ribbon.
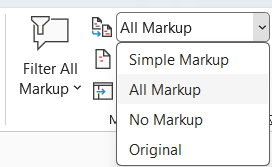
- Beside Display for Review in the Markup group, click the arrow to the right of All Markup. A drop-down menu appears.
- Select No Markup from the drop-down menu. Word will hide the markup and comments will not be displayed and will not be printed. You can change the markup display after you have printed the document.
- Click the File tab in the Ribbon.
- Select Print. Comments should not appear in the preview on the right.
- Click Print.
The Markup options appear in the Review tab in the Ribbon (below):
Stop comments from printing by changing Print options
To stop comments from printing by changing Print options:
- Open the Word document containing comments. Comments should appear in the panel on the right.
- Click the File tab in the Ribbon.
- Select Print. On the right a preview appears with comments.
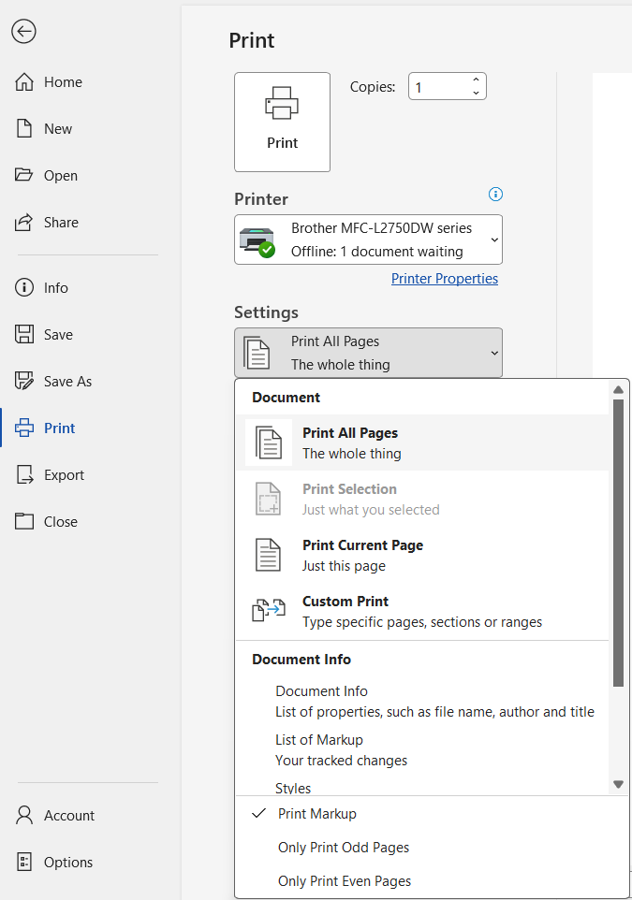
- Under Settings, click the arrow to the right of Print All Pages. A drop-down menu appears.
- Select Print Markup to de-select or uncheck it. Comments will no longer appear in the preview on the right.
- Click Print.
The Print Options below include an option to Print Markup (deslect to print without comments / markup):
Final thoughts
You can print a document without comments using the methods above. If you want to delete comments, check out the article How to Remove Comments in Word (4 Ways to Delete Comments).
Subscribe to get more articles like this one
Did you find this article helpful? If you would like to receive new articles, JOIN our email list.
More resources
How to Create a Table of Contents in Word
14+ Word Selection Shortcuts to Quickly Select Text
How to Superscipt or Subscript in Word (with Shortcuts)
4 Strikethough Shortcuts in Microsoft Word to Cross Out Text
How to Reduce the File Size of Word Documents (10+ Ways to Compress Word Files)
Related courses
Microsoft Word: Intermediate / Advanced
Microsoft Word: Designing Dynamic Word Documents Using Fields
Microsoft Word: Long Documents Master Class
Microsoft Excel: Intermediate / Advanced
Microsoft PowerPoint: Intermediate / Advanced
To request this page in an alternate format, contact us.
Our instructor-led courses are delivered in virtual classroom format or at our downtown Toronto location at 18 King Street East, Suite 1400, Toronto, Ontario, Canada (some in-person classroom courses may also be delivered at an alternate downtown Toronto location). Contact us at info@avantixlearning.ca if you'd like to arrange custom instructor-led virtual classroom or onsite training on a date that's convenient for you.
Copyright 2026 Avantix® Learning
You may also like
How to Cut, Copy and Paste Text in Word (5 Ways with Shortcuts)
In this guide, we'll cover 5 ways to cut, copy and paste text in Microsoft Word. A common method is to use keyboard shortcuts but you can also use the Ribbon, the context menu and a few hidden tools as well. After you paste your text, you can choose paste options such as Keep Text Only.

How to Insert or Type an Upside Down Exclamation Mark in Word (5 Ways to Insert ¡ with Shortcuts)
This guide covers five easy ways to insert or type the upside down exclamation mark (¡) in Microsoft Word including shortcuts, Alt codes and custom key combinations. The upside down exclamation mark or inverted exclamation mark is used in the Spanish language at the beginning of exclamatory sentences and helps readers understand tone before completing the sentence.

How to Insert or Type I with an Accent Mark in Word (Í, í, Ì, ì, Î, î, Ï, or ï)
You can insert or type i with an accent mark in Word using built-in tools or keyboard shortcuts (including Alt code shortcuts). The letter i can be inserted with an accent in both upper or lower case. The following are common accented characters that you can insert or type in Word in upper or lower case: grave (Ì or ì), acute (Í or í), circumflex (Î or î) and umlaut (Ï or ï).
Image credit(s) / application screenshot(s): Microsoft
Microsoft, the Microsoft logo, Microsoft Office and related Microsoft applications and logos are registered trademarks of Microsoft Corporation in Canada, US and other countries. All other trademarks are the property of the registered owners.
Avantix Learning |18 King Street East, Suite 1400, Toronto, Ontario, Canada M5C 1C4 | Contact us at info@avantixlearning.ca