Insert and Edit SmartArt Graphics in PowerPoint
by Avantix Learning Team | Updated September 2, 2026
Applies to: Microsoft® PowerPoint® 2019, 2021, 2024 and 365 (Windows)
SmartArt graphics are pre-defined graphics that are treated as one object and follow the document theme, font theme and color theme unless a user manually changes the font and font and shape colors. SmartArt graphics are also "smart" in several ways such as resizing other components if a new shape is added and changing font size. You can insert SmartArt in several ways in PowerPoint. SmartArt objects are typically inserted on PowerPoint slides in Normal View.
Contents
- Insert a SmartArt graphic in a content placeholder
- Insert a SmartArt graphic in a blank area on a slide
- Convert a list of bullet points to a SmartArt graphic
- Convert multiple pictures to a SmartArt graphic
- Insert a SmartArt graphic using the Designer (Design Suggestions or Design Ideas)
- Change an icon in a SmartArt graphic
- Change SmartArt layout
- Change SmartArt style
- Change SmartArt colors
- Edit SmartArt using the Text Pane
- Delete a shape
- Add a shape using the Ribbon
- Reorder shapes using the Ribbon
- Reorder shapes using the Mini-Toolbar
- Final thoughts
Note: Buttons and Ribbon tabs may display in a different way (with or without text) depending on your version of PowerPoint, the size of your screen and your Control Panel settings. For PowerPoint 365 users, some features may be available that are not available in earlier versions of PowerPoint. Screenshots in this article are from PowerPoint 365 but are similar in earlier versions.
Recommended article: 20 PowerPoint Tips and Shortcuts to Work Faster with SmartArt
Do you want to learn more about PowerPoint? Check out our virtual classroom or in-person classroom PowerPoint courses >
Insert a SmartArt graphic in a content placeholder
You can insert SmartArt into a content placeholder on a PowerPoint slide.
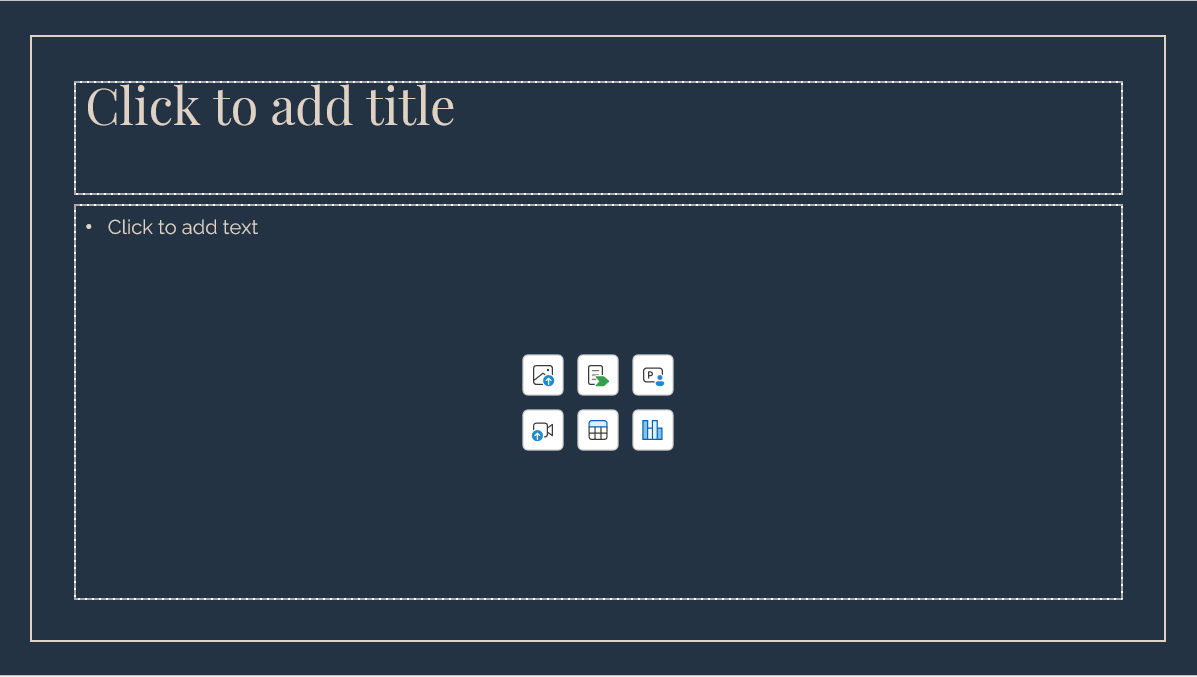
The Title and Content slide below includes a content placeholder (the icons are slightly different from previous versions of PowerPoint):
To insert a SmartArt graphic in a content placeholder on a new PowerPoint slide:
- In Normal View, click the Insert tab in the Ribbon.
- In the Slides group, click New Slide. A drop-down menu appears.
- Select a layout that contains a content placeholder such as Title and Content. Icons appear in the content placeholder. You can click an icon to insert different types of content in the placeholder.
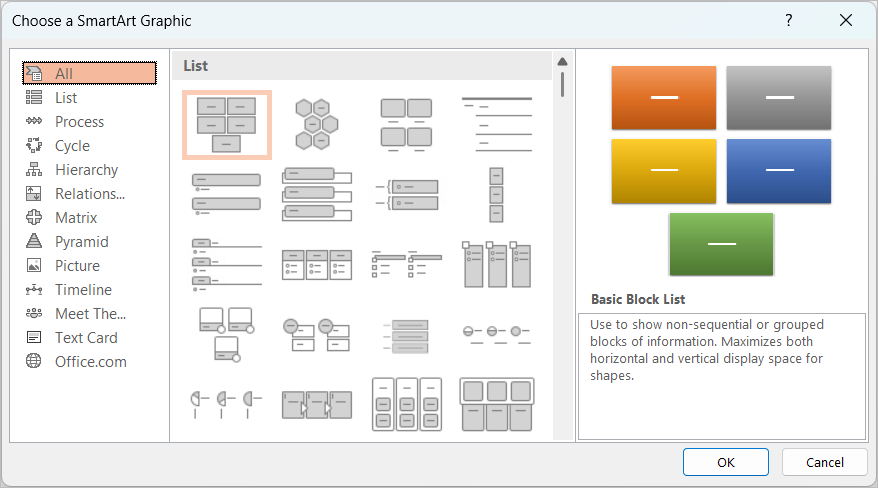
- Click SmartArt (Insert a SmartArt Graphic) in the content placeholder. The Choose a SmartArt Graphic dialog box appears with a gallery of different types of SmartArt.
- Click a category on the left and then click a SmartArt graphic on the right.
- Click OK.
- Drag the handles of the SmartArt object to resize it.
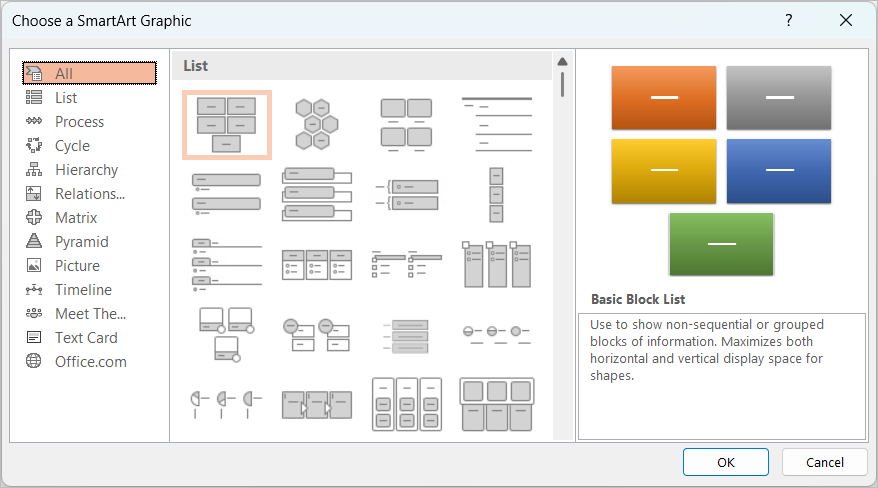
The Choose a SmartArt Graphic dialog box appears as follows (several new categories have been added in PowerPoint 365):
Insert a SmartArt graphic in a blank area on a slide
To insert a SmartArt graphic in a blank area on a new PowerPoint slide:
- In Normal View, click the Insert tab in the Ribbon.
- In the Slides group, click New Slide. A drop-down menu appears.
- Select a layout that contains a blank area such as Title Only. It's best to include a title on each slide if possible. This will allow you to navigate to a slide when you run a slide show.
- Click the Insert tab in the Ribbon.
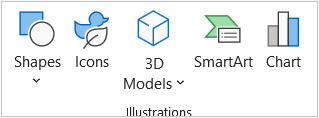
- Click SmartArt (Insert a SmartArt Graphic) in the Illustrations group. The Choose a SmartArt Graphic dialog box appears with a gallery of different types of SmartArt.
- Click a category on the left and then click a SmartArt graphic on the right.
- Click OK.
- Drag the handles of the SmartArt object to resize it.
The SmartArt command appears on the Insert tab in the Ribbon in the Illustrations group (below):
Convert a list of bullet points to a SmartArt graphic
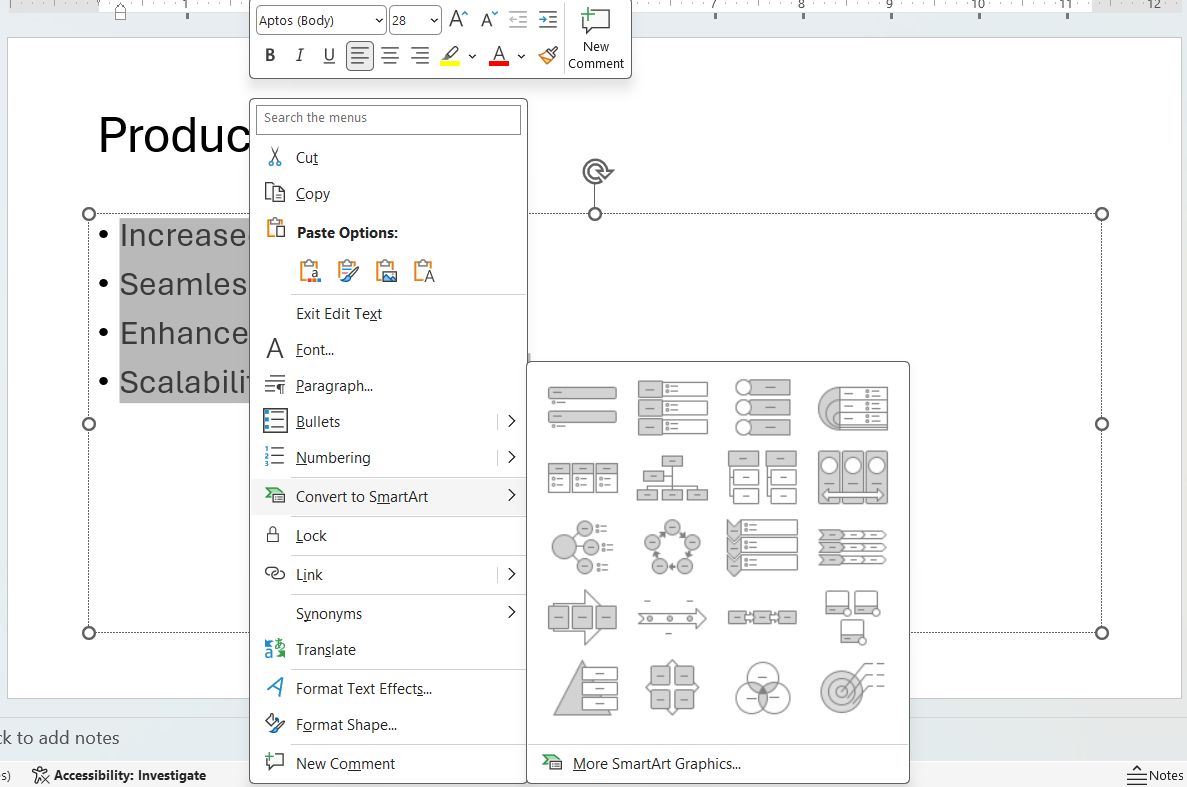
Another option is to convert a bulleted list to SmartArt. The list can be in a placeholder or in a text box. If you have multiple levels of bullets, you may have difficulty converting to certain SmartArt layouts. Single levels of bullets will generally convert reliably.
To insert a SmartArt graphic by converting a list of bullet points to a SmartArt graphic:
- In Normal View, select the bulleted list in a placeholder or in a text box on a slide.
- Right-click the selected text and choose Convert to SmartArt from the drop-down menu. From the sub-menu, choose More SmartArt Graphics. Alternatively, you can click the Home tab in the Ribbon and select Convert to SmartArt Graphic in the Paragraph group. From the sub-menu, select More SmartArt Graphics. The Choose a SmartArt Graphic dialog box appears with a gallery of different types of SmartArt.
- Click a category on the left and then click a SmartArt graphic on the right.
- Click OK.
- Drag the handles of the SmartArt object to resize it.
In the following example, a bulleted list is selected to convert to SmartArt:
In the example below, the bulleted list has been converted to SmartArt:

Convert multiple pictures to a SmartArt graphic
You can convert multiple pictures to a SmartArt graphic and the pictures will be resized automatically.
To convert pictures to a SmartArt graphic:
- Insert multiple pictures on a slide in Normal View using the Insert Pictures command in the Ribbon. The pictures should not be inserted into placeholders.
- Select the pictures (Shift + click each picture).
- Click the Picture Format tab in the Ribbon.
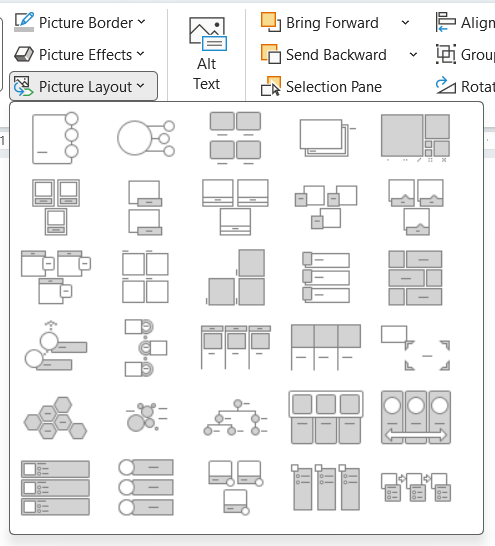
- Click Picture Layout in the Picture Styles group and then select a Picture layout (these are SmartArt picture layouts). The pictures will be converted to SmartArt.
- Drag the handles of the SmartArt object to resize it.
The Picture Layout command appears on the Picture Format tab in the Ribbon when multiple pictures are selected as follows:
If you are not satisfied with the size of an image or its position in the SmartArt object, you can change the size and position by cropping the picture.
To crop a picture in a SmartArt graphic to change size and position:
- Click the picture in the SmartArt graphic.
- Click the Picture Format tab in the Ribbon.
- Click Crop in the Size group.
- Drag the corner circular sizing handles of the image to resize it proportionally.
- Position the image by clicking in the middle of the picture and dragging it.
- Click Crop to exit crop mode or click in a blank area on the slide.
Insert a SmartArt graphic using the Designer (Design Suggestions or Design Ideas)
In PowerPoint, you can also use the Designer (Design Suggestions or Design Ideas) to insert a SmartArt graphic. This strategy will usually work best if a bulleted list appears on the slide in a placeholder or text box
To insert a SmartArt graphic to replace a bulleted list using the Designer (Design Suggestions or Design Ideas):
- In Normal View, enter a bulleted list in a placeholder or in a text box on a slide.
- If the Designer does not appear in the task pane on the right, click the Design tab in the Ribbon and then click Design Suggestions or Design Ideas in the Edit group.
- Scroll through the suggested slide layouts in the task pane.
- Click a layout that includes the SmartArt you want to use.
The first time you use the Designer, PowerPoint will ask for permission. Click Turn on to enable the Designer.
The Designer may suggest SmartArt that includes icons based on the content you have on your slide. Icons can help enhance the design of the slide.
In the example below, the Designer offers suggestions for several SmartArt designs which include icons:
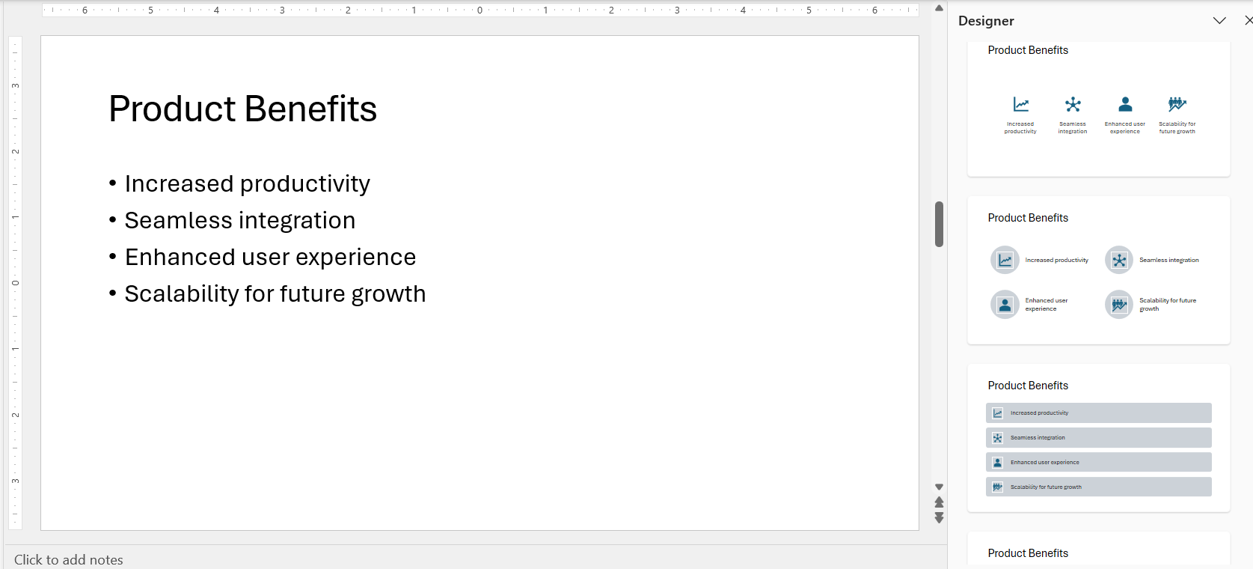
The bulleted list in the following example has been converted to SmartArt using the Designer:

Change an icon in a SmartArt graphic
If you have inserted a SmartArt graphic with icons, you may want to change the icons. Icons are created from PowerPoint's library of icons.
To change an icon in a SmartArt graphic:
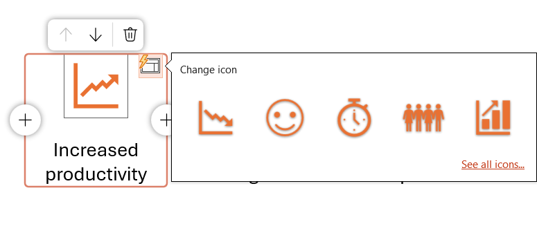
- Click the icon you want to change. A Replace Icon Smart Tag appears.
- Click the Smart Tag. A menu appears.
- Click See all icons.
- Click the icon you want.
- Click Insert.
A Smart Tag to change an icon appears when you click an icon in a SmartArt object (below):
Change SmartArt layout
You can change the SmartArt layout if you want. Keep in mind that some layouts may have limitations in terms of content and the number of elements.
To change the SmartArt layout:
- Click the SmartArt object.
- Click the SmartArt Design tab in the Ribbon.
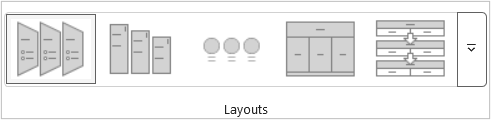
- In the Layouts group, click the layout you want to use. If you want more options, click the arrow on the bottom right of the gallery to display more layouts and choose More Layouts. The Choose a SmartArt Graphic dialog box appears with a gallery of different types of SmartArt.
- Click a category on the left and then click a SmartArt graphic on the right.
- Click OK.
Layouts appear on the SmartArt Design tab in the Layouts group as follows:
Change SmartArt style
To change the SmartArt style:
- Click the SmartArt object.
- Click the SmartArt Design tab in the Ribbon.
- In the SmartArt Styles group, click More down arrow and then select the style you want to use.
SmartArt Styles appear on the SmartArt Design tab in the SmartArt Styles group as follows (and change depending on the type of SmartArt):

Change SmartArt colors
SmartArt is created based on the color theme in the presentation.
To change SmartArt colors:
- Click the SmartArt object.
- Click the SmartArt Design tab in the Ribbon.
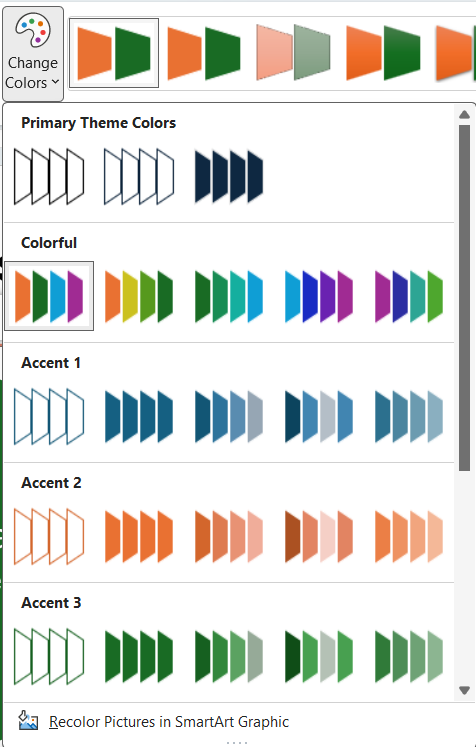
- In the SmartArt Styles group, click Change Colors. A drop-down menu appears.
- Click the colors you want to use.
In the following example, the Change Colors options are displayed for the selected SmartArt object with colors from the color theme:
Edit SmartArt using the Text Pane
When a SmartArt graphic is inserted, a Text Pane may appear on the left and SmartArt Design and Format tabs should appear in the Ribbon. You can enter text in the Text Pane or in the SmartArt itself.
To display the Text Pane if it is not displayed:
- Click the SmartArt graphic.
- Click the SmartArt Design tab in the Ribbon.
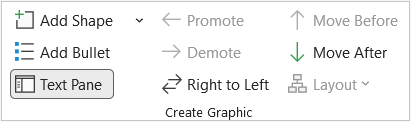
- Click Text Pane in the Create Graphic group. The Text Pane appears.
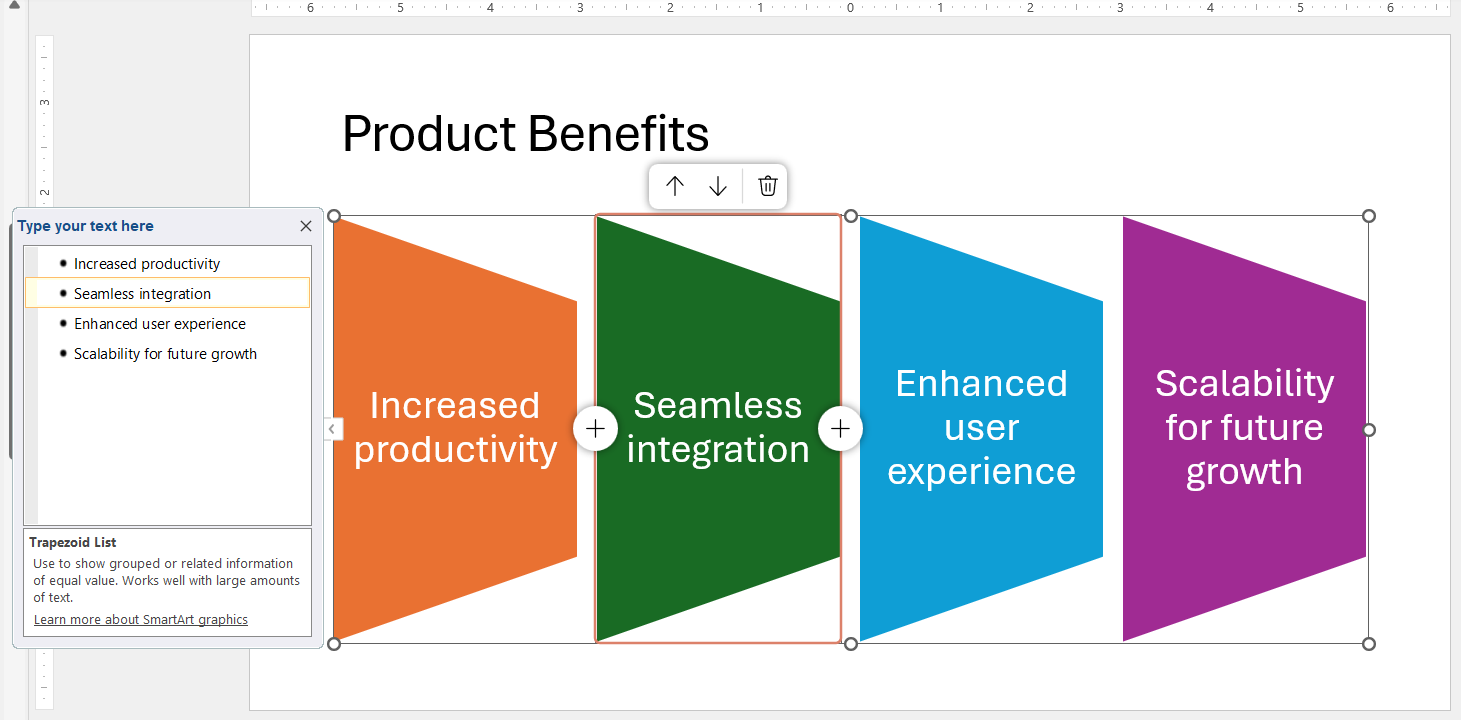
In the following example, the Text Pane appears to the left of the selected SmartArt object:
In the Text Pane, you can type text in bullet points. You can also cut and paste if you want to reorder shapes in a SmartArt object (Press Ctrl + X to cut and Ctrl + V to paste in the Text Pane). You can also press Tab to demote items and press Shift + Tab to promote items.
The the example below, the Text Pane appears to the left of the SmartArt graphic:
Delete a shape
To delete a shape from a SmartArt object:
- Select the shape you want to delete.
- Press Delete.
You can also delete text in the Text Pane to delete a shape.
Add a shape using the Ribbon
To add a shape to a SmartArt object using the Ribbon:
- Click a shape in the SmartArt object.
- Click the SmartArt Design tab in the Ribbon.
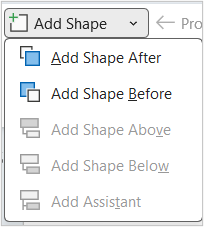
- Click Add Shape in the Create Graphic group. A drop-down menu appears.
- Choose the desired option (such as Add Shape Before or After).
The Add Shape command appears on the SmartArt Design tab in the Ribbon in the Create Graphic group when a shape in a SmartArt object is selected (below):
You can also add shapes using the Text Pane.
Reorder shapes using the Ribbon
To reorder shapes in a SmartArt object using the Ribbon:
- Click a shape in the SmartArt object.
- Click the SmartArt Design tab in the Ribbon.
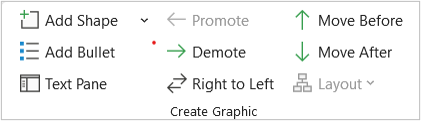
- Click Move Before or Move After in the Create Graphic group.
The commands to move shapes appear on the SmartArt Design tab in the Ribbon in the Create Graphic group when a shape in a SmartArt object is selected (below):
Reorder shapes using the Mini-Toolbar
To reorder shapes in a SmartArt object using the Mini-Toolbar (available in newer versions of PowerPoint):
- Click a shape in the SmartArt object. A Mini-Toolbar appears at the top of the SmartArt object.
- Click the up or down arrow in the Mini-Toolbar that appears above the SmartArt object to move a shape before or after the previous shape.
Final thoughts
Inserting SmartArt is a quick way to add visual interest to a slide. With SmartArt objects, you can easily add, move and delete shapes and the object will adjust to the changes automatically. Because SmartArt follows color themes and font themes, these objects integrate into the "look" of a presentation seamlessly.
Subscribe to get more articles like this one
Did you find this article helpful? If you would like to receive new articles, JOIN our email list.
More resources
How to Rotate Objects in PowerPoint
How to Align Objects in PowerPoint (4 Ways)
10 Great PowerPoint Drawing Tricks and Shortcuts
How to Use the Eyedropper in PowerPoint to Match Colors
How to Animate Text, Images and Other Objects in PowerPoint
Related courses
Microsoft PowerPoint: Intermediate / Advanced
Microsoft PowerPoint: Design for Non-Designers
Microsoft PowerPoint: Animations Bootcamp
Our instructor-led courses are delivered in virtual classroom format or at our downtown Toronto location at 18 King Street East, Suite 1400, Toronto, Ontario, Canada (some in-person classroom courses may also be delivered at an alternate downtown Toronto location). Contact us at info@avantixlearning.ca if you'd like to arrange custom instructor-led virtual classroom or onsite training on a date that's convenient for you.
Copyright 2026 Avantix® Learning
You may also like
How to Insert and Format Icons in PowerPoint
You can curve text in PowerPoint using WordArt Transform options on the Shape tab in the Ribbon. The text can be WordArt text or text in a text box or in a placeholder. Using Transform text effects, you can curve or bend selected text. The text can be curved around a circle or other shape if you want. Typically, curved text is inserted in Normal View and can be a word or a line of text.

How to Highlight or Draw on PowerPoint Slides During a Slide Show
You can highlight text in PowerPoint in many different ways. If you have PowerPoint 2019 or a later version, Text Highlight Color is available on the Home tab in the Ribbon. For those with older versions without a Highlight command in the Ribbon, you'll need to use other strategies to highlight text. In this article, we'll review five ways to highlight text in PowerPoint. Most of these strategies will work in all versions.
How to Highlight Text in PowerPoint (5 Ways)
You can highlight text in PowerPoint in many different ways. If you have PowerPoint 2019 or a later version, Text Highlight Color is available on the Home tab in the Ribbon. For those with older versions without a Highlight command in the Ribbon, you'll need to use other strategies to highlight text. In this article, we'll review five ways to highlight text in PowerPoint. Most of these strategies will work in all versions.
Image credit(s) / application screenshot(s): Microsoft
Microsoft, the Microsoft logo, Microsoft Office and related Microsoft applications and logos are registered trademarks of Microsoft Corporation in Canada, US and other countries. All other trademarks are the property of the registered owners.
Avantix Learning |18 King Street East, Suite 1400, Toronto, Ontario, Canada M5C 1C4 | Contact us at info@avantixlearning.ca