Check Out These Tips and Shortcuts to Insert and Format SmartArt in PowerPoint
by Avantix Learning Team | Updated March 12, 2021
Applies to: Microsoft® PowerPoint® 2013, 2016, 2019 and 365 (Windows)
If you're inserting and formatting SmartArt in PowerPoint, there are several tips and shortcuts you can use to work faster with SmartArt objects.
Some of the following shortcuts are sequential shortcuts so Alt > N > M would mean press Alt, then N and then M.
Recommended article: How to Group or Ungroup Objects in PowerPoint (with Shortcuts)
Do you want to learn more about PowerPoint? Check out our virtual classroom or live classroom PowerPoint courses >
1. Inserting a SmartArt object on a slide
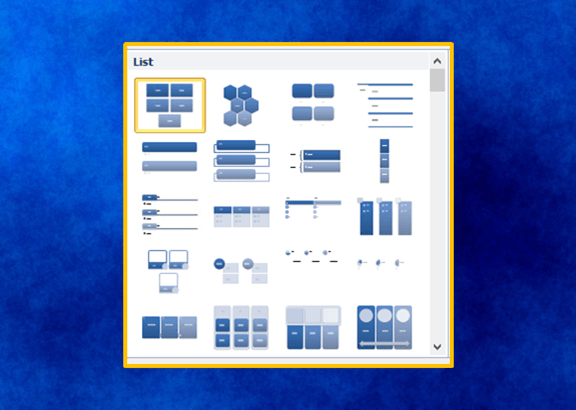
Press ALT > N > M. The gallery appears. Press tab to move to the list of layouts. Keep pressing arrow keys until the desired SmartArt object is selected and then press Enter.
Below is the SmartArt Gallery in PowerPoint:

2. Selecting a SmartArt object with a keyboard
Keep pressing Escape until no object is selected and then keep pressing Tab until the desired SmartArt object is selected.
3. Moving between shapes in a SmartArt object using a keyboard
Select the SmartArt object or one shape in the SmartArt object and then keep pressing Tab to move to the next shape.
4. Displaying the Text Pane
Select a SmartArt object and then press Alt > JS > X.
5. Switching between the Text Pane and the SmartArt object
Press Ctrl + Shift + F2.
6. Selecting multiple shapes using the Text Pane
Select a line of text in the Text Pane and then press Shift + down arrow to select additional shapes.
7. Indenting text in the Text Pane
With the cursor positioned in a line of text in the Text Pane, press Tab.
8. Outdenting text in the Text Pane
With the cursor positioned in a line of text in the Text Pane, press Shift + Tab.
9. Increasing the size of a shape
With a shape selected, press Shift + up arrow or Shift + right arrow.
10. Decreasing the size of a shape
With a shape selected, press Shift + down arrow or Shift + left arrow.
11. Increasing the size a shape in small increments
With a shape selected, press Ctrl + Shift + up arrow or Shift + right arrow.
12. Decreasing the size of a shape in small increments
With a shape selected, press Ctrl + Shift + down arrow or Shift + left arrow.
13. Reordering a shape up in a SmartArt object
With a shape selected, press Alt > JS > U.
14. Reordering a shape down within the SmartArt object
With a shape selected, press Alt > JS > W.
15. Moving a shape
With a shape selected, press an arrow key to move a shape in the direction of the arrow.
16. Nudging a shape in small increments
With a shape selected, press Ctrl + an arrow key to nudge in the direction of the arrow.
17. Opening the SmartArt Layout Gallery
Select the SmartArt object and press Alt > JS > L > M.
18. Rotating a shape by 15 degrees
With a shape selected, press Alt + right arrow or Alt + left arrow.
19. Rotating a shape by 1 degree
With a shape selected, press Ctrl + Alt + right arrow or Ctrl + Alt + left arrow.
20. Resetting a SmartArt object
With the SmartArt object selected, press Alt > JS > E. This will remove all custom formatting.
This article was originally published on September 10, 2017 and has been updated for clarity and content.
Subscribe to get more articles like this one
Did you find this article helpful? If you would like to receive new articles, join our email list.
More resources
How to Rotate Objects in PowerPoint
How to Remove the Background of an Image in PowerPoint
How to Animate Text, Images and Other Objects in PowerPoint
Related courses
Microsoft PowerPoint: Intermediate / Advanced
Microsoft PowerPoint: Design for Non-Designers
Microsoft PowerPoint: Animations Bootcamp
Our instructor-led courses are delivered in virtual classroom format or at our downtown Toronto location at 18 King Street East, Suite 1400, Toronto, Ontario, Canada (some in-person classroom courses may also be delivered at an alternate downtown Toronto location). Contact us at info@avantixlearning.ca if you'd like to arrange custom instructor-led virtual classroom or onsite training on a date that's convenient for you.
Copyright 2025 Avantix® Learning
You may also like

How to Cut, Copy and Paste Text in Word (5 Ways with Shortcuts)
In this guide, we'll cover 5 ways to cut, copy and paste text in Microsoft Word. A common method is to use keyboard shortcuts but you can also use the Ribbon, the context menu and a few hidden tools as well. After you paste your text, you can choose paste options such as Keep Text Only.

How to Insert or Type an Upside Down Exclamation Mark in Word (5 Ways to Insert ¡ with Shortcuts)
This guide covers five easy ways to insert or type the upside down exclamation mark (¡) in Microsoft Word including shortcuts, Alt codes and custom key combinations. The upside down exclamation mark or inverted exclamation mark is used in the Spanish language at the beginning of exclamatory sentences and helps readers understand tone before completing the sentence.
How to Insert and Format Icons in PowerPoint
You can curve text in PowerPoint using WordArt Transform options on the Shape tab in the Ribbon. The text can be WordArt text or text in a text box or in a placeholder. Using Transform text effects, you can curve or bend selected text. The text can be curved around a circle or other shape if you want. Typically, curved text is inserted in Normal View and can be a word or a line of text.
Image credit(s) / application screenshot(s): Microsoft
Microsoft, the Microsoft logo, Microsoft Office and related Microsoft applications and logos are registered trademarks of Microsoft Corporation in Canada, US and other countries. All other trademarks are the property of the registered owners.
Avantix Learning |18 King Street East, Suite 1400, Toronto, Ontario, Canada M5C 1C4 | Contact us at info@avantixlearning.ca


