Microsoft Publisher: Introduction
Microsoft Publisher Training Series | Level 1
Course Details
Duration: 1 day
Microsoft® Publisher® Versions: 2010 | 2013 | 2016 | 365
Delivery Methods: Instructor-led classroom (ILC) | Virtual classroom (VC) on request
Course Dates: June 23, 2017 | View schedule ![]()
Course Fee: $295 CDN per person + HST or BYOD (bring your own device): $245 CDN person + HST*
Note: public scheduled dates for this course are delivered as live instructor-led classroom training
![]()
Course Overview
In this hands-on course, students will use Microsoft Publisher to create different types of publications including flyers, newsletters and brochures. Text and picture frames will be created to hold text and graphics in a publication. Various types of formatting will then be applied to text, images and drawing objects. Students will import text from Microsoft Word and then link and unlink text frames across pages. In order to eliminate repetitive entry and formatting, students will also use styles and master pages. Customized publications will be created and merged to files or to generate emails to multiple contacts. Throughout this course, the instructor will include numerous tips, tricks and shortcuts.
Prerequisite: Microsoft Word: Introduction or equivalent knowledge and skills.
Custom training: This course may be delivered at your site or ours as an instructor-led or virtual classroom solution. For more information including savings for custom group training, email us at info@avantixlearning.ca or contact us by phone.
INCLUDED IN THIS COURSE
- Comprehensive course manual or published book
- Sample and exercise files
- Refreshments (for classes conducted in Avantix Learning classrooms)
- Certificate of completion
- Follow-up email support
Course Topics
Microsoft Publisher Environment
- Working with the Ribbon and the various Publisher settings
- Viewing and selecting templates
- Specifying font and colour themes
- Setting up personal or business information sets
- Zooming in and zooming out quickly and easily
Creating a Publication
- Creating a new blank publication
- Changing the font and colour theme or scheme
- Ensuring the Ruler is displayed
- Setting and removing ruler and layout guides
Working with Text
- Creating text boxes and entering text into text boxes
- Formatting text using fonts, font size and different type styles
- Changing spacing including leading, kerning and tracking
- Applying paragraph formatting including indents and tabs
- Importing text into text boxes
- Linking and unlinking text boxes
- Creating multiple columns
- Rotating text
Working with Images and Shapes
- Inserting shapes
- Formatting shapes
- Resizing and moving shapes
- Inserting pictures
- Resizing, moving, formatting and cropping pictures
- Rotating images and shapes
- Wrapping text around images and shapes
- Changing stacking order
Creating, Editing and Applying Master Pages
- Viewing master pages
- Setting up guides, text and logos on master pages to appear on publication pages
- Viewing publication pages
- Applying masters to specific pages
Working with Tables
- Inserting tables into a publication
- Entering data into tables
- Inserting and deleting rows and columns
- Applying borders, fills and other formatting
Direct Mail and Email Marketing with Publisher
- Creating custom publications for specific clients using the mail merge tool
- Creating custom emails to multiple contacts by merging to email for a marketing campaign
Register Now for a public course in our downtown Toronto location.
Do you need more information? Contact us!
Updated April 21, 2017.
Copyright 2017 Avantix Learning Inc.
To request this page in an alternate format, contact our staff.
*Prices subject to change.

Custom Training
Register now for a public scheduled course or contact us to discuss custom training options..
Related courses
Microsoft Word: Intermediate/Advanced
Microsoft Word: Designing Accessible Word Documents
Microsoft Excel: Intermediate/Advanced
You may like
How to Insert and Format Icons in PowerPoint
You can curve text in PowerPoint using WordArt Transform options on the Shape tab in the Ribbon. The text can be WordArt text or text in a text box or in a placeholder. Using Transform text effects, you can curve or bend selected text. The text can be curved around a circle or other shape if you want. Typically, curved text is inserted in Normal View and can be a word or a line of text.

How to Highlight or Draw on PowerPoint Slides During a Slide Show
You can highlight text in PowerPoint in many different ways. If you have PowerPoint 2019 or a later version, Text Highlight Color is available on the Home tab in the Ribbon. For those with older versions without a Highlight command in the Ribbon, you'll need to use other strategies to highlight text. In this article, we'll review five ways to highlight text in PowerPoint. Most of these strategies will work in all versions.
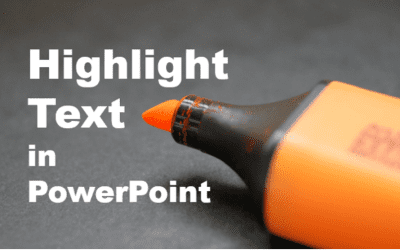
How to Highlight Text in PowerPoint (5 Ways)
You can highlight text in PowerPoint in many different ways. If you have PowerPoint 2019 or a later version, Text Highlight Color is available on the Home tab in the Ribbon. For those with older versions without a Highlight command in the Ribbon, you'll need to use other strategies to highlight text. In this article, we'll review five ways to highlight text in PowerPoint. Most of these strategies will work in all versions.
You may also like

How to Cut, Copy and Paste Text in Word (5 Ways with Shortcuts)
In this guide, we'll cover 5 ways to cut, copy and paste text in Microsoft Word. A common method is to use keyboard shortcuts but you can also use the Ribbon, the context menu and a few hidden tools as well. After you paste your text, you can choose paste options such as Keep Text Only.

How to Insert or Type an Upside Down Exclamation Mark in Word (5 Ways to Insert ¡ with Shortcuts)
This guide covers five easy ways to insert or type the upside down exclamation mark (¡) in Microsoft Word including shortcuts, Alt codes and custom key combinations. The upside down exclamation mark or inverted exclamation mark is used in the Spanish language at the beginning of exclamatory sentences and helps readers understand tone before completing the sentence.

How to Insert or Type I with an Accent Mark in Word (Í, í, Ì, ì, Î, î, Ï, or ï)
You can insert or type i with an accent mark in Word using built-in tools or keyboard shortcuts (including Alt code shortcuts). The letter i can be inserted with an accent in both upper or lower case. The following are common accented characters that you can insert or type in Word in upper or lower case: grave (Ì or ì), acute (Í or í), circumflex (Î or î) and umlaut (Ï or ï).