
Display Key Tasks in Microsoft Project's Timeline View
by Avantix Learning Team | Updated October 13, 2022
Applies to: Microsoft® Project® 2010, 2013, 2016, 2019 and 365 (Standard and Professional)
Timelines are a great way to view key tasks and milestones in a project. You can add tasks to a timeline and then format it any way you'd like. The Timeline View is available in Microsoft Project 2010 and later versions and displays by default. You can add and remove items from a timeline and copy a timeline into an email or Word or PowerPoint file to present the timeline. In this article, we'll focus on a single timeline (although Project 2016 now supports multiple timelines and you can create views with different timelines).
Recommended article: 10 Timesaving Shortcuts in Microsoft Project's Gantt Chart View
Do you want to learn more about Microsoft Project? Check out our virtual classroom or live classroom Project courses >
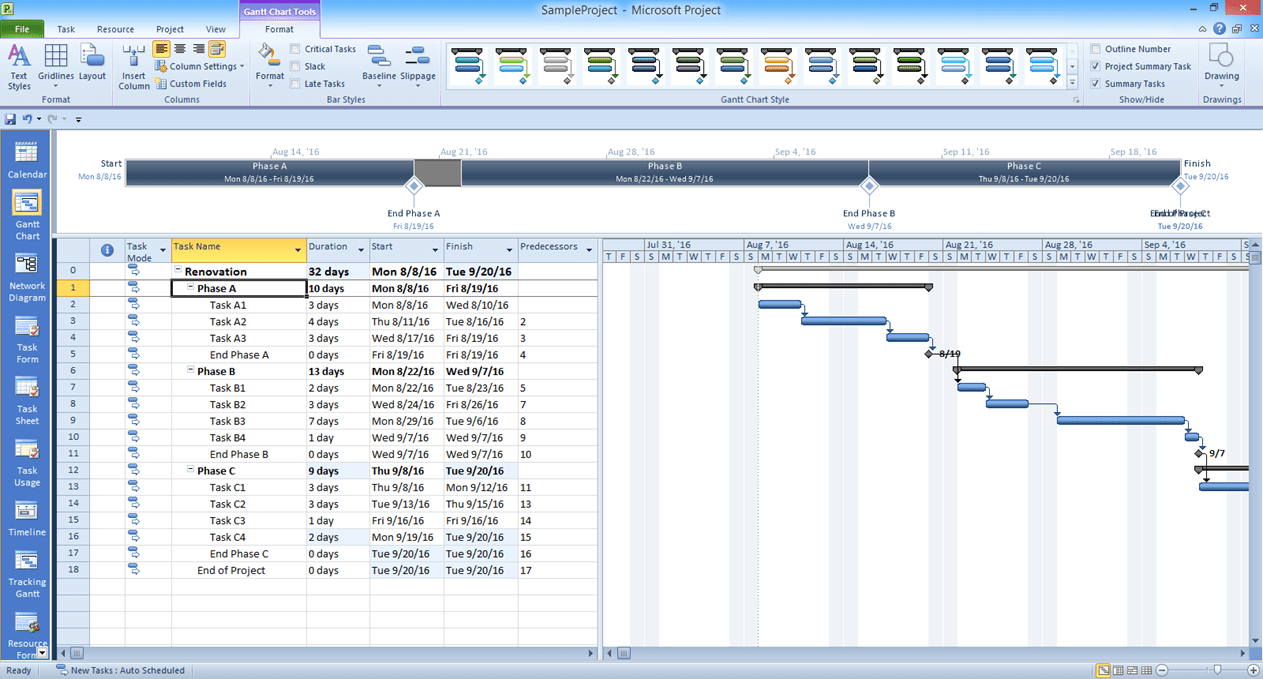
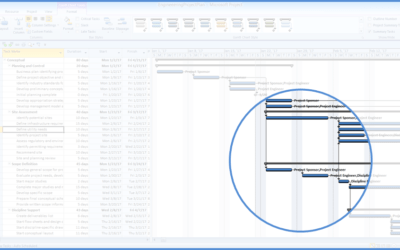
Below is a sample project with a timeline which includes summary and milestone tasks:
Display the Timeline View
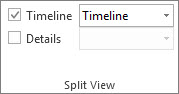
The Timeline View is displayed by default when you first install Project. However, you can turn the Timeline View off and on using Options or by selecting Timeline on the View tab in the Ribbon:
Work with Timeline Tools
When you click in the timeline, a Timeline Tools Format tab appears with options for the timeline.
In order to work with just the timeline and not move the Gantt Chart, turn off Pan & Zoom in the Show/Hide group.

Add single tasks to a timeline
To add single tasks to a timeline:
- Right-click a task and then select Add to Timeline from the drop-down menu. Alternatively, click Add to Timeline on the Task tab in the Ribbon.
- Repeat this for each task or milestone you want to add.

Add multiple tasks to a timeline
To add multiple tasks to a timeline:
- Click the ID of the first task.
- Ctrl-click the IDs of subsequent tasks.
- Right-click one of the selected tasks and select Add to Timeline. Alternatively, click Add to Timeline in the Properties group on the Task tab in the Ribbon.
Tip: timelines can work well if you add only summary tasks and milestones to the timeline.
If you want to add just milestone and summary tasks, you could filter to display milestone and summary tasks first and then repeat the steps above to add these tasks to the timeline.
Remove tasks from a timeline
To remove tasks from a timeline:
- Click the bar, diamond or callout text in the timeline that you want to delete.
- Select Remove from Timeline in the Timeline Tools Format tab or right-click the item and select Remove from Timeline. You can also simply press Delete.
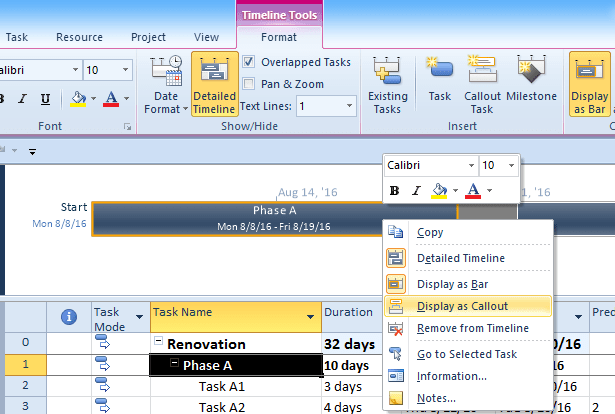
Display tasks as callouts in a timeline
Initially, tasks are displayed as bars on a timeline. To display tasks as callouts:
- Click a task in the timeline.
- Click he Timeline Tools Format tab and then select Display as Callout. You can also right-click he task and select Display as Callout from the menu. The task now points to the timeline from above or below the timeline. You can then drag the task to the desired location.
If you want to change a callout to a bar again, click on the callout and then click on Display as Bar on the Format tab on the Ribbon to turn it back into a bar. You can also right-click on the task and select Display as Bar from the menu.
Below is a timeline with summary tasks as callouts:

Add rows in a timeline
To add rows in a timeline:
- Click a bar task in the timeline.
- Drag tasks up or down within the timeline to show them on different rows.
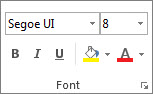
Change colors in a timeline
To change colors in a timeline:
- Click the task you want to change in the timeline. To select multiple tasks, Ctrl-click each task.
- C;ocl the Timeline Tools Format tab and then click Background/Fill or Font Color and select a color.
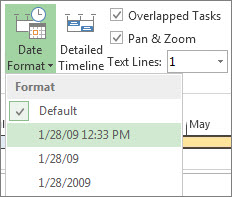
Change the date format
To change the date format:
- Click anywhere on the timeline.
- Click the Timeline Tools Format tab and then click Date Format.
- Select the desired format from the drop-down menu.
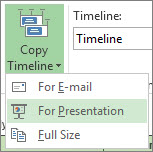
Share a timeline in an email, PowerPoint presentation or Word document
To share a timeline in an email, PowerPoint presentation or Word document:
- Click anywhere in the timeline.
- Click the Timeline Tools Format tab and then select Copy Timeline. A drop-down menu appears.
- Select For E-mail for a small size which is best for an email message. Select For Presentation for a medium size which is designed to work in a PowerPoint slide. Select Full Size for a large size which is the same size as it appears in Project.
- Paste the timeline by pressing Ctrl + V in an email Word or PowerPoint file.
 .
.
Print a timeline
To print a timeline:
- Drag the line below the timeline to the bottom of the screen.
- Select the File tab in the Ribbon and then select Print.
- Choose the desired print options and click Print.
- To return to the split view, click the View tab in the Ribbon and then select Timeline.
Subscribe to get more articles like this one
Did you find this article helpful? If you would like to receive new articles, JOIN our email list.
More resources
Auto vs Manual Scheduling in Microsoft Project
Send Microsoft Project Data to Excel with Visual Reports
10 Microsoft Project Tips for Working Efficiently with Tables
7 Microsoft Project Navigation and Selection Shortcuts in Task Lists
10 Shortcuts to Zoom and Move Quickly in Microsoft Project's Gantt Chart Timescale
Related courses
Microsoft Project: Introduction
Microsoft Project: Intermediate / Advanced
Microsoft Project: Introduction to VBA (Visual Basic for Applications)
Our instructor-led courses are delivered in virtual classroom format or at our downtown Toronto location at 18 King Street East, Suite 1400, Toronto, Ontario, Canada (some in-person classroom courses may also be delivered at an alternate downtown Toronto location). Contact us at info@avantixlearning.ca if you'd like to arrange custom instructor-led virtual classroom or onsite training on a date that's convenient for you.
Copyright 2024 Avantix® Learning
You may also like

7 Microsoft Project Navigation and Selection Shortcuts in Task Lists
If you are working in Gantt Chart view, you can use these keyboard shortcuts to quickly move and select in your task list.
10 Microsoft Project Shortcuts to Zoom and Move Quickly in the Gantt Chart Timescale
Zoom in, out and move using these great shortcuts in the Microsoft Project Gantt Chart timescale. The timescale in the Gantt Chart view appears on the right side and displays units of time.

Auto vs Manual Scheduling in Microsoft Project
In newer versions of Microsoft Project, you have the option of scheduling tasks using manual or auto scheduling. In earlier versions, Microsoft Project used auto scheduling which takes advantage of Project's scheduling engine to schedule tasks.
Microsoft, the Microsoft logo, Microsoft Office and related Microsoft applications and logos are registered trademarks of Microsoft Corporation in Canada, US and other countries. All other trademarks are the property of the registered owners.
Avantix Learning |18 King Street East, Suite 1400, Toronto, Ontario, Canada M5C 1C4 | Contact us at info@avantixlearning.ca


