Cutting a Circle Out of a Picture on a PowerPoint Slide Using Merge Shapes
by Avantix Learning Team | Updated March 12, 2021
Applies to: Microsoft® PowerPoint® 2013, 2016, 2019 and 365 (Windows)
Starting in Microsoft PowerPoint 2013, you can use the Merge Shapes tool to crop an image into a circle. You can use Intersect in Merge Shapes to cut out a circle (or other shape) from a picture. If you have a version of PowerPoint prior to 2013, you'll need to use a different method (such as crop to shape) to cut a circle out of a picture.
To crop a picture into a circle by cutting a circle out of the image, you'll need to:
- Insert a picture onto a slide (in Normal View).
- Draw a circle on top of the picture and move it to the area you want to cut out of the picture.
- Select the picture and then the circle by Shift-clicking.
- Use Merge Shapes to intersect.
When you are drawing or moving an object, use your left mouse button.
Note: Buttons and Ribbon tabs may display in a different way (with or without text) depending on your version of PowerPoint, the size of your screen and your Control Panel settings. For PowerPoint 365 users, Ribbon tabs may appear with different names. For example, the Picture Tools Format tab may appear as Picture Format and the Drawing Tools Format tab may appear as Drawing Format or Shape Format.
Recommended article: How to Crop an Image into a Circle in PowerPoint (Crop to Shape Method)
Do you want to learn more about PowerPoint? Check out our virtual classroom or live classroom PowerPoint courses >
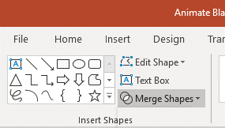
Merge Shapes appears on the Drawing Tools Format, Drawing Format or Shape Format tab when multiple objects are selected:
Merge Shapes includes the following options (hover over the options to view the effect on the selected objects):
- Union – converts the selected objects into one object.
- Combine – converts the selected objects into one object and removes the overlapping areas.
- Fragment – converts larger objects into many smaller objects based on their overlapping areas.
- Intersect – removes areas of the larger objects and leaves only the areas that overlap each object.
- Subtract – removes areas of the last selected object that does not overlap.
Step 1: Insert a picture onto a slide
To insert a picture from a drive onto a slide in PowerPoint 2013, 2016 or 2019:
- In Normal View, display the slide where you want to insert the picture.
- Click the Insert tab in the Ribbon and select Pictures. A dialog box appears.
- Navigate to the folder with the picture you want to insert.
- Double-click the picture. The picture will be placed on the slide.
- Drag the picture to the desired location.
- Drag a corner handle of the picture to resize it.
To insert a picture from a drive onto a slide in PowerPoint 365:
- In Normal View, display the slide where you want to insert the picture.
- Click the Insert tab in the Ribbon and select Pictures. A drop-down menu appears.
- Select This Device.
- Navigate to the folder with the picture you want to insert.
- Double-click the picture. The picture will be placed on the slide.
- Drag the picture to the desired location.
- Drag a corner handle of the picture to resize it.
For other ways to insert a picture in PowerPoint 365, check out How to Insert a Picture in PowerPoint 365 from a Drive, Stock Images or Online Pictures.
Step 2: Draw a circle on top of the picture
To draw a circle on top of the picture:
- Click the Insert tab in the Ribbon and from the Shapes drop-down menu, select the oval. The pointer changes to a plus sign.
- Position the pointer on the slide, hold down Shift and drag to draw a circle.
- Release the mouse button first and then release Shift. This should create a perfect circle.
- Select the circle, click the Drawing Tools Format, Drawing Format or Shape Format tab in the Ribbon and select Shape Fill. A drop-down menu appears.
- From the menu, select No Fill. Because the circle has no fill, you'll need to select it by clicking its edge.
- Drag the circle (by its edge) over the area of the picture that you want to cut out. You can also use your arrow keys to move the circle.
Step 3: Select the picture and the circle and merge the shapes
To select the picture and then the circle and merge the shapes:
- Click the picture.
- Shift-click the edge of the circle.
- Click the Drawing Tools Format, Drawing Format or Shape Format tab in the Ribbon.
- In the Insert Shapes group, click Merge Shapes and then select Intersect from the drop-down menu.
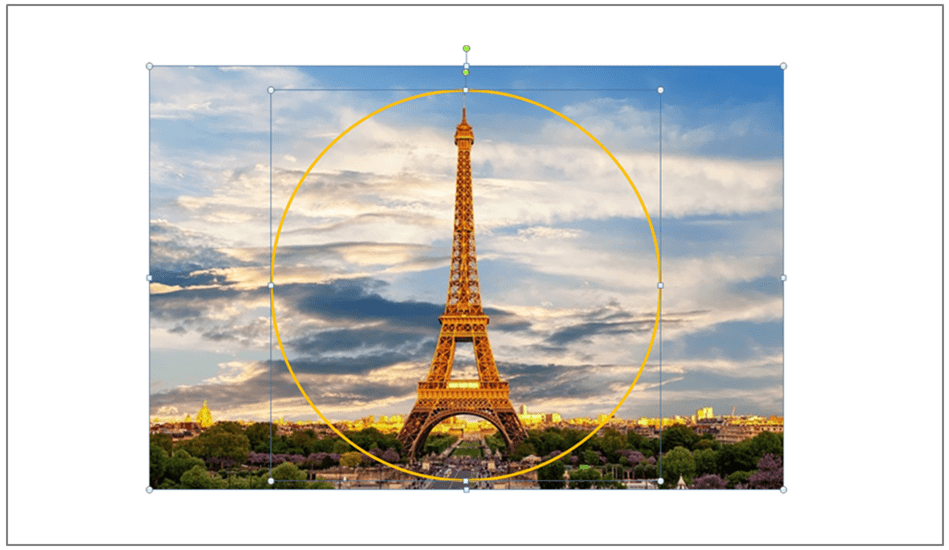
In the following example, we selected a picture and then selected a circle on a PowerPoint slide (the order in which you select the objects is important):
Below is the final result with the circle cut out of the picture using Merge Shapes and Intersect:
When you use Merge Shapes with a picture and a shape, PowerPoint creates a new shape so you will not be able to uncrop the picture at a later date. You can undo Merge Shapes immediately by pressing Ctrl + Z but that will only undo your last action.
Subscribe to get more articles like this one
Did you find this article helpful? If you would like to receive new articles, join our email list.
More resources
How to Crop a Picture in PowerPoint (4 Ways)
10 Ways to Compress PowerPoint Presentations to Reduce File Size
How to Quickly Remove All Speaker Notes in a PowerPoint Presentation
How to Fade Text in and Out in a PowerPoint Presentation Using Animations
How to Compress Images in PowerPoint to Reduce File Size (10 Strategies)
Related courses
Microsoft PowerPoint: Intermediate / Advanced
Microsoft PowerPoint: Design for Non-Designers
Microsoft PowerPoint: Animations Bootcamp
Our instructor-led courses are delivered in virtual classroom format or at our downtown Toronto location at 18 King Street East, Suite 1400, Toronto, Ontario, Canada (some in-person classroom courses may also be delivered at an alternate downtown Toronto location). Contact us at info@avantixlearning.ca if you'd like to arrange custom instructor-led virtual classroom or onsite training on a date that's convenient for you.
Copyright 2024 Avantix® Learning
You may also like
How to Insert or Type E with an Accent Mark in PowerPoint (È, É, Ê, Ë, è, é, ê, or ë)
You can insert or type e with an accent mark in PowerPoint using built-in tools or keyboard shortcuts (including Alt code shortcuts). The letter e can be inserted with an accent in both upper or lower case in text boxes or placeholders on slides, the slide master or layouts. The following are common accents in upper or lower case – È, É, Ê, Ë, è, é, ê, or ë.
How to Fade a Picture or Part of a Picture in PowerPoint (Using a Gradient)
You can fade a picture in PowerPoint by drawing a rectangle shape on top of the picture and then filling the rectangle with a gradient from opaque to transparent. This technique is often used to fade an image into the background of a slide. Since the rectangle is placed on top of the image and then text may be placed on top of the rectangle, you may need to reorder the objects.
How to Lock an Image, Shape or Other Object in PowerPoint
You can now lock an image, shape or other object in PowerPoint. Objects can be locked in Normal View or Slide Master View. Only PowerPoint 365 users can lock objects to prevent moving and resizing. This is helpful if you want to select and move other objects on the slide or prevent others from moving or resizing an object. You can lock items using the context menu or the Selection Pane.
Microsoft, the Microsoft logo, Microsoft Office and related Microsoft applications and logos are registered trademarks of Microsoft Corporation in Canada, US and other countries. All other trademarks are the property of the registered owners.
Avantix Learning |18 King Street East, Suite 1400, Toronto, Ontario, Canada M5C 1C4 | Contact us at info@avantixlearning.ca


