Use These Simple Tricks in Gantt Chart Task Lists
by Avantix Learning Team | Updated June 11, 2021
Applies to: Microsoft® Project® 2010, 2013, 2016, 2019 and 365 (Standard and Professional)
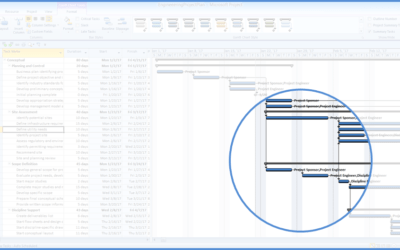
If you are working in Gantt Chart View, you can use these keyboard shortcuts to quickly move and select in your task list.
Recommended article: 10 Timesaving Shortcuts in Microsoft Project's Gantt Chart View
1. Go to the top of the task list
In Gantt Chart view, press Ctrl + Home to move to the top of the task list.
2. Go to the end of the task list
In Gantt Chart view, press Ctrl + down arrow to move to the bottom of the task list.
3. Find a task by name
In Gantt Chart view, press Ctrl + F to display the Find dialog. Enter part of the name in the Find What box (note that Project assumes you want to look in the Name field as Task Name is actually a label). Press Enter. Project will take you to the first task with the matching text in the Name field.
4. Display the Gantt Chart bar for a selected task
A common problem in Project is that the Gantt Chart does not display the bar for the selected task to the right of the task list in the Gantt Chart. Often the screen has scrolled over as the result of another action. In Gantt Chart view, click in the task and press Ctrl + Shift + F5 to "line up" the Gantt Chart with the selected task. In older versions, this was called Go to Selected Task.
5. Move up or down by task
In Gantt Chart view, press up or down arrow keys.
6. Select up or down by task
In Gantt Chart view, press Shift + up or down arrow keys.
7. Select all tasks
In Gantt Chart view, select the first task and then press Ctrl + Shift + down arrow.
This article was first publsihed on January 27, 2015 and has been updated for clarity and content.
Subscribe to get more articles like this one
Did you find this article helpful? If you would like to receive new articles, join our email list.
More resources
Auto vs Manual Scheduling in Microsoft Project
10 Microsoft Project Tips for Working Efficiently with Tables
How to Create a Timeline in MIcrosoft Project
Related courses
Microsoft Project: Introduction
Microsoft Excel: Intermediate / Advanced
Microsoft Excel: Data Analysis with Functions, Dashboards and What-If Analysis Tools
Microsoft Excel: Introduction to Power Pivot and Power Query Business Intelligence Tools
Our instructor-led courses are delivered in virtual classroom format or at our downtown Toronto location at 18 King Street East, Suite 1400, Toronto, Ontario, Canada (some in-person classroom courses may also be delivered at an alternate downtown Toronto location). Contact us at info@avantixlearning.ca if you'd like to arrange custom instructor-led virtual classroom or onsite training on a date that's convenient for you.
Copyright 2024 Avantix® Learning
You may also like
10 Microsoft Project Shortcuts to Zoom and Move Quickly in the Gantt Chart Timescale
Zoom in, out and move using these great shortcuts in the Microsoft Project Gantt Chart timescale. The timescale in the Gantt Chart view appears on the right side and displays units of time.
Auto vs Manual Scheduling in Microsoft Project
In newer versions of Microsoft Project, you have the option of scheduling tasks using manual or auto scheduling. In earlier versions, Microsoft Project used auto scheduling which takes advantage of Project's scheduling engine to schedule tasks.
How to Create a Timeline in Microsoft Project
Timelines are a great way to view key tasks and milestones in a project. You can add tasks to a timeline and then format it any way you'd like. Copy a timeline into an email or Word or PowerPoint file to present the timeline.
Microsoft, the Microsoft logo, Microsoft Office and related Microsoft applications and logos are registered trademarks of Microsoft Corporation in Canada, US and other countries. All other trademarks are the property of the registered owners.
Avantix Learning |18 King Street East, Suite 1400, Toronto, Ontario, Canada M5C 1C4 | Contact us at info@avantixlearning.ca


